Building a Veggie Patch the Possums Couldn't Get Into
The beds came first and they worked beautifully. Three raised timber boxes against the back fence, filled with good soil, planted out with seedlings we’d raised from punnets. For about two weeks it looked like we’d cracked it.
Then the wildlife found it. Possums took the tops off the bok choy and gai lan overnight. They went through the lettuce, stripped anything tender and came back the next night for whatever was left. We’d done all the work of building and filling the beds and were running a free buffet for every possum in the suburb.
So the real project turned out to be the enclosure, not the veggie patch. We had to build a cage the possums couldn’t beat before the beds would produce a thing.
Starting from seed
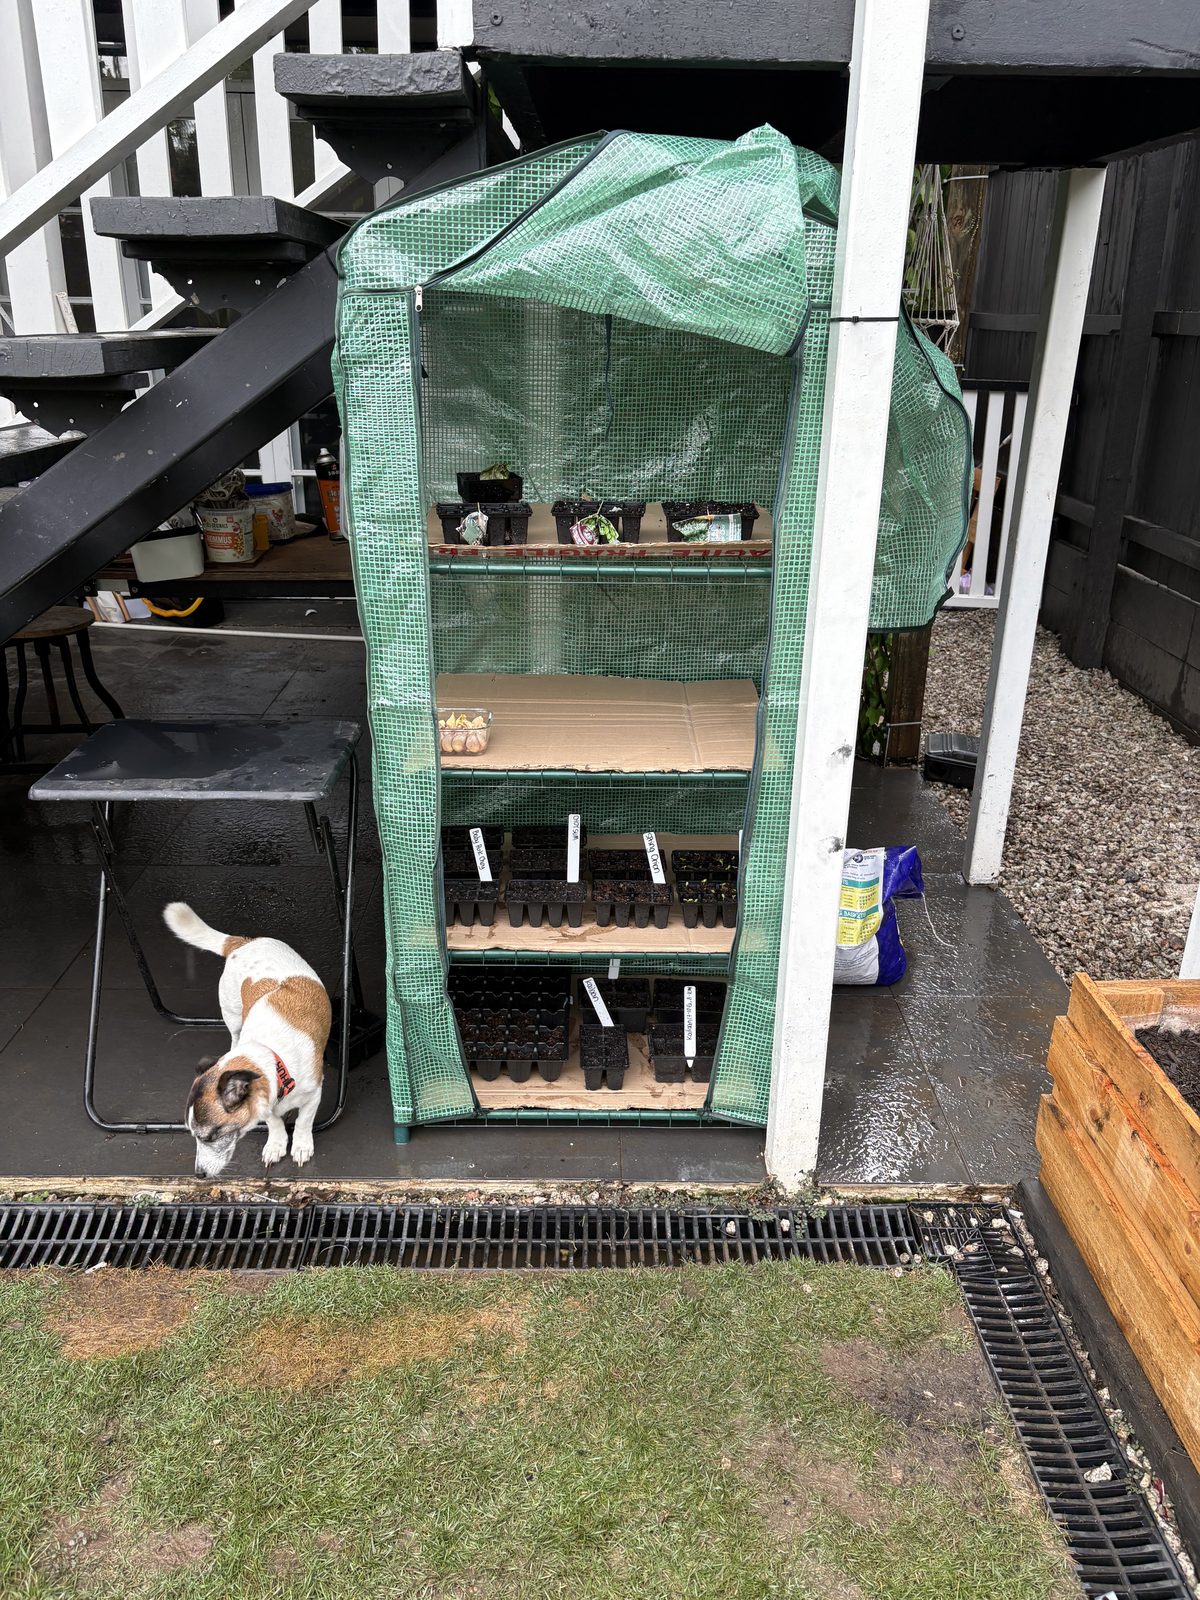
We started most of it from seed in a cheap pop-up greenhouse on the deck. It’s nothing fancy - a zip-up frame with shelves, but it’s enough to get punnets going and keep them out of the worst of the weather while they’re fragile.
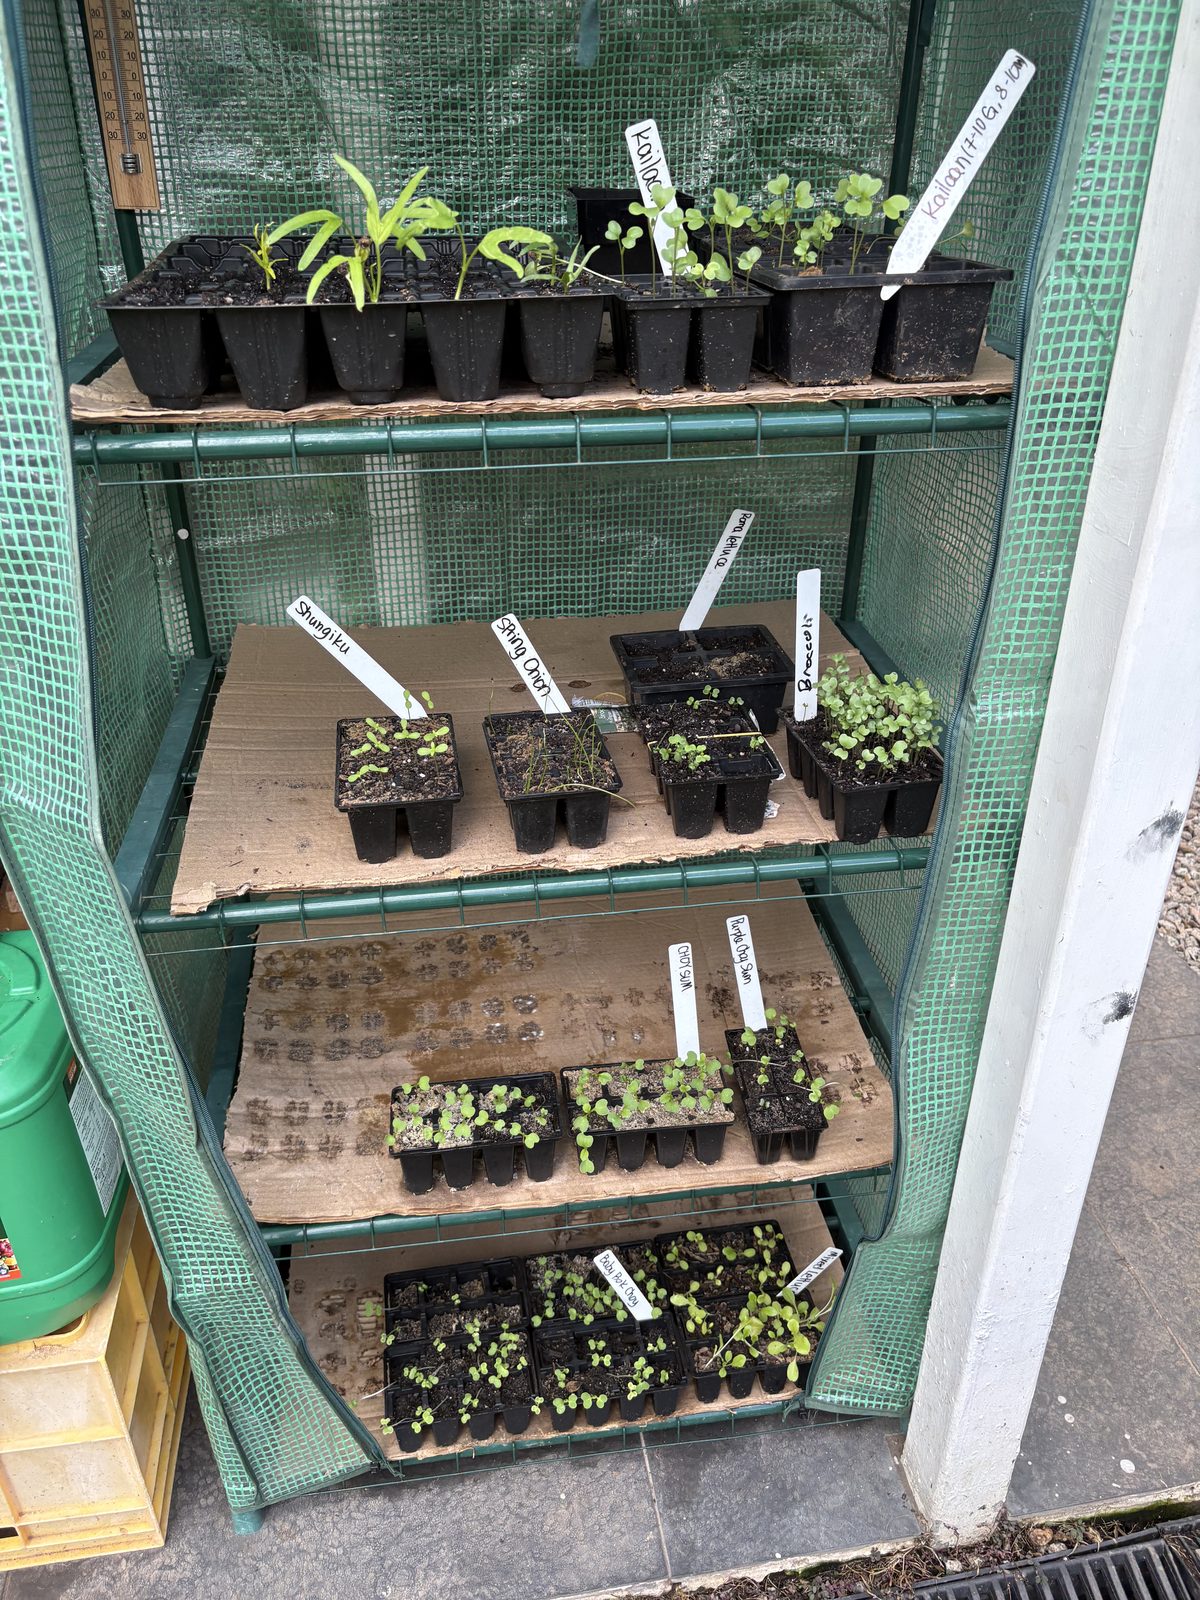
A mix of leafy greens and Asian veg, mostly: kailaan, choy sum, pak choy, shungiku, a couple of lettuces, broccoli, spring onions. Things that turn around quickly and that we actually cook with. Raising them from seed is cheaper than buying advanced seedlings and you get varieties the nursery never stocks, but it does mean every plant you finally put in the ground represents weeks of work, which made losing them to possums sting all the more.
The beds and filling them
The beds themselves are straightforward: treated timber raised boxes set on a gravel-and-paver base along the southern fence, three of them with gravel paths between. The bigger job was filling them, because good soil volume is most of what makes a raised bed work and you need a surprising amount of it.
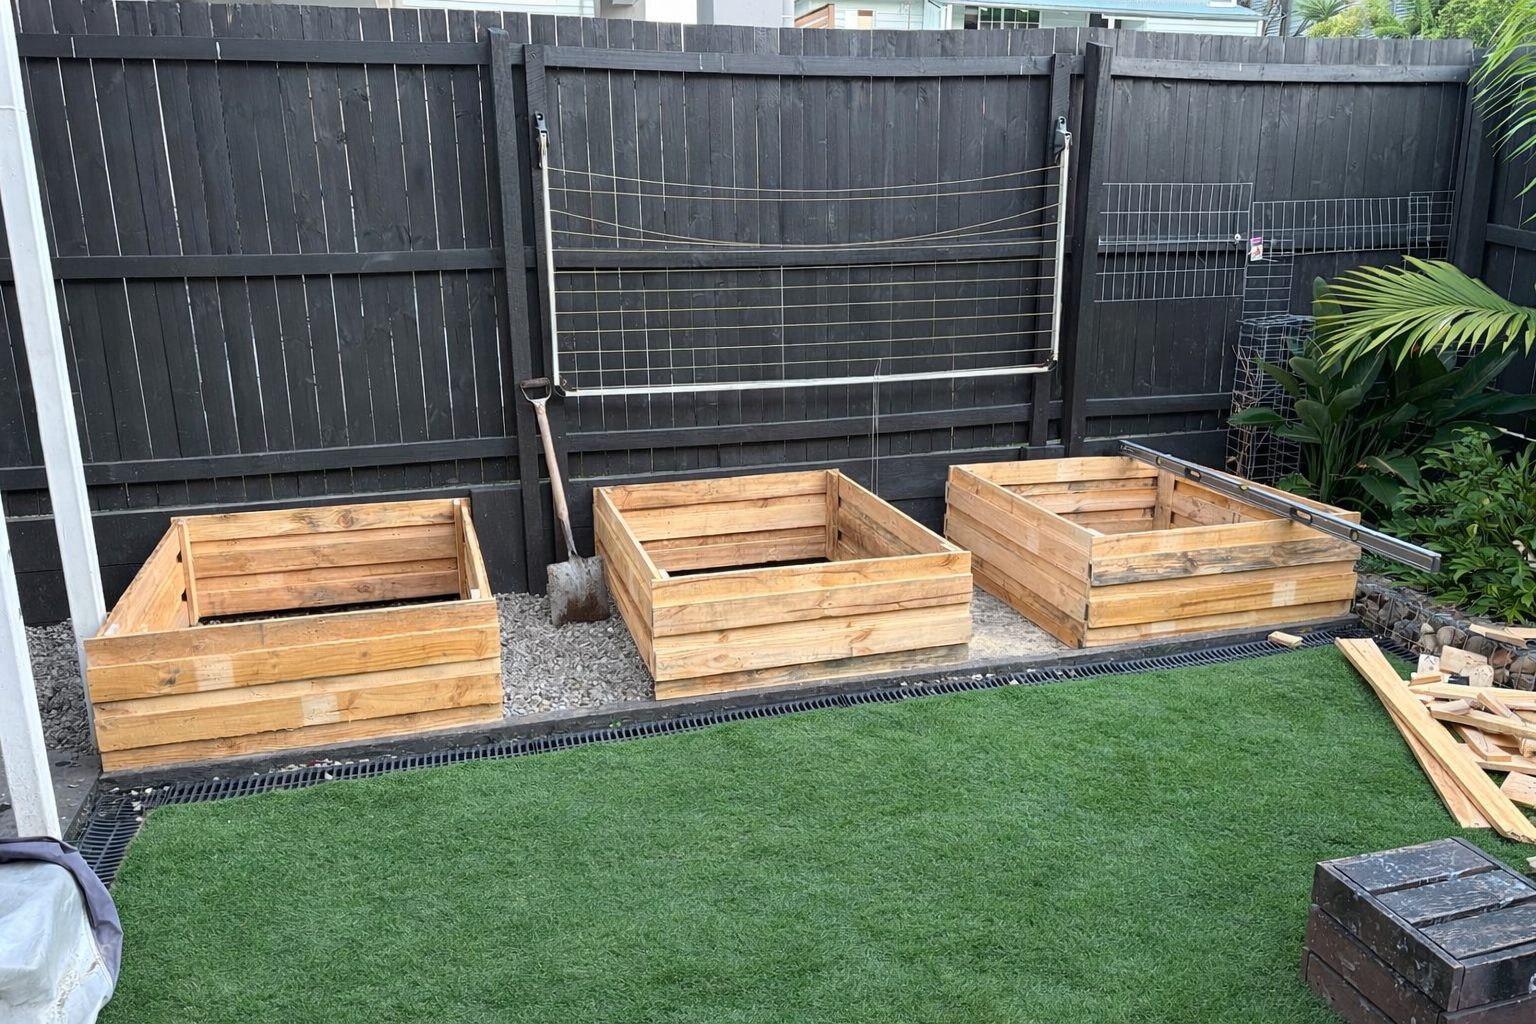
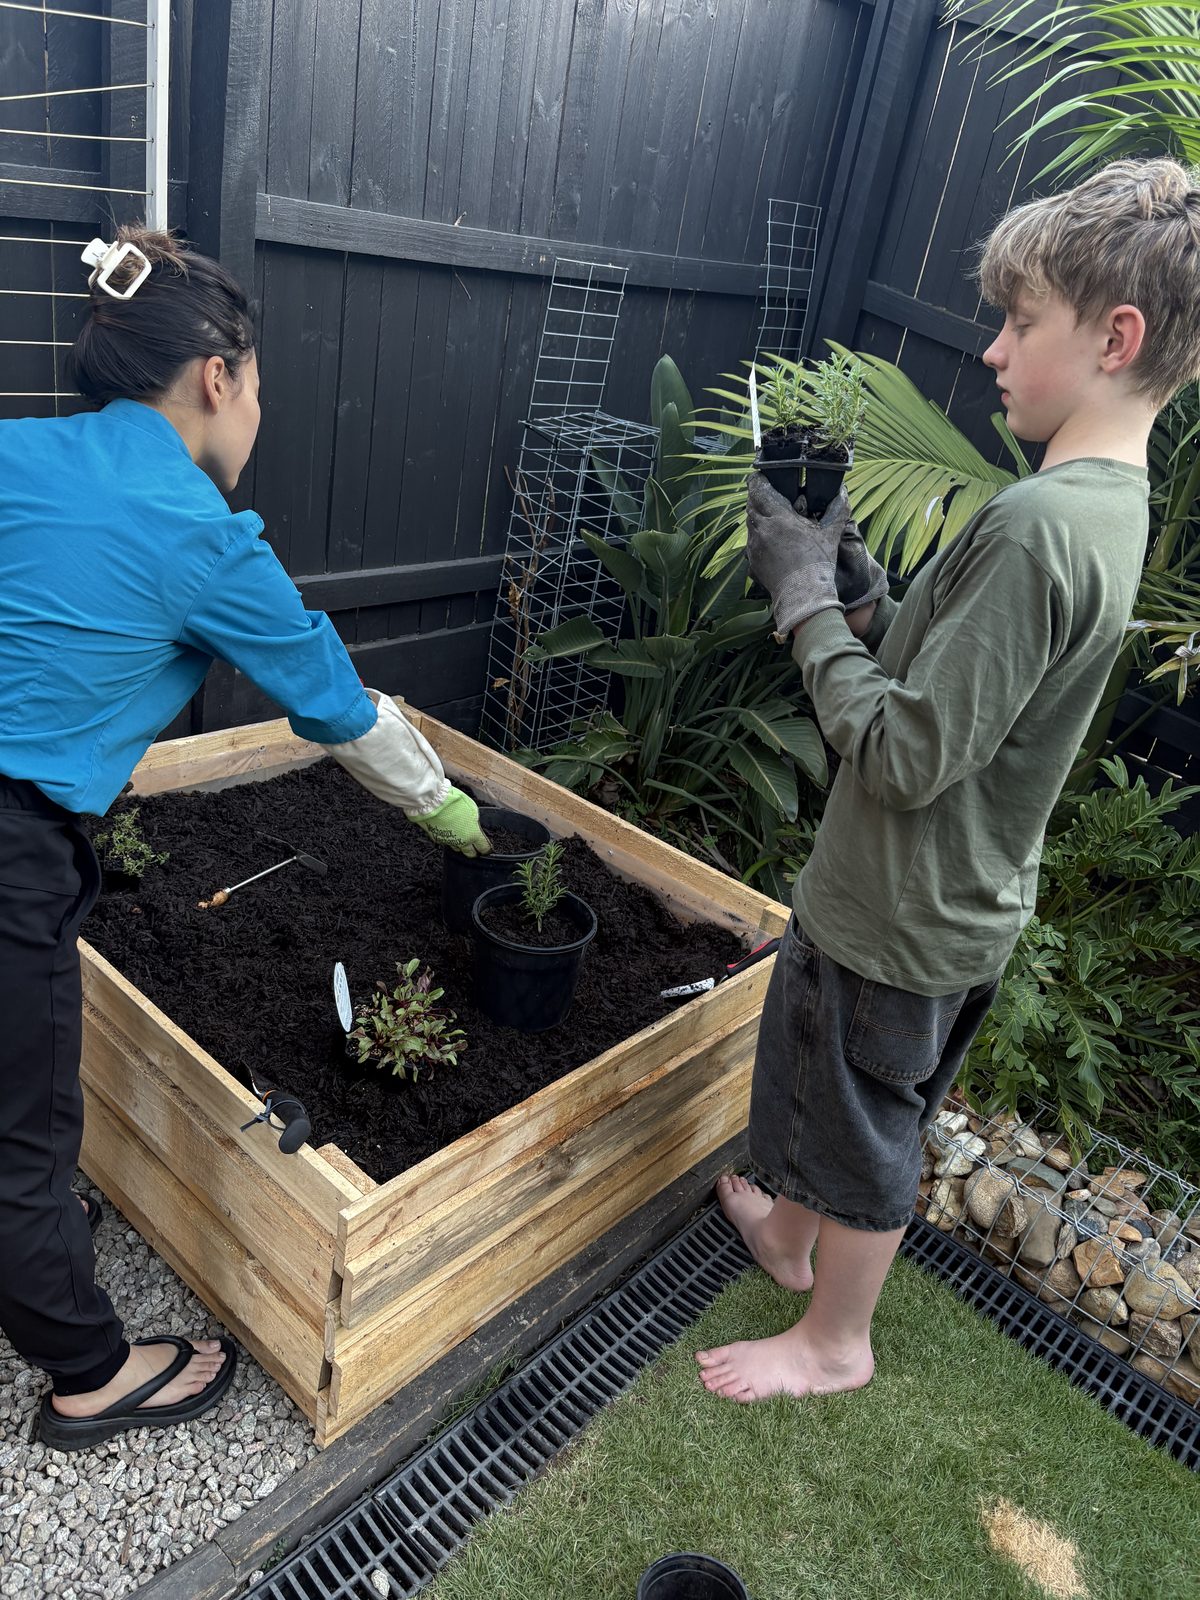
We filled them with a blend rather than a single product - garden soil mix as the base, mushroom compost and a cow manure blend worked through for fertility, plus sugarcane mulch on top to hold moisture. It’s a wheelbarrow-and-tarp job and a good one to rope the family into.
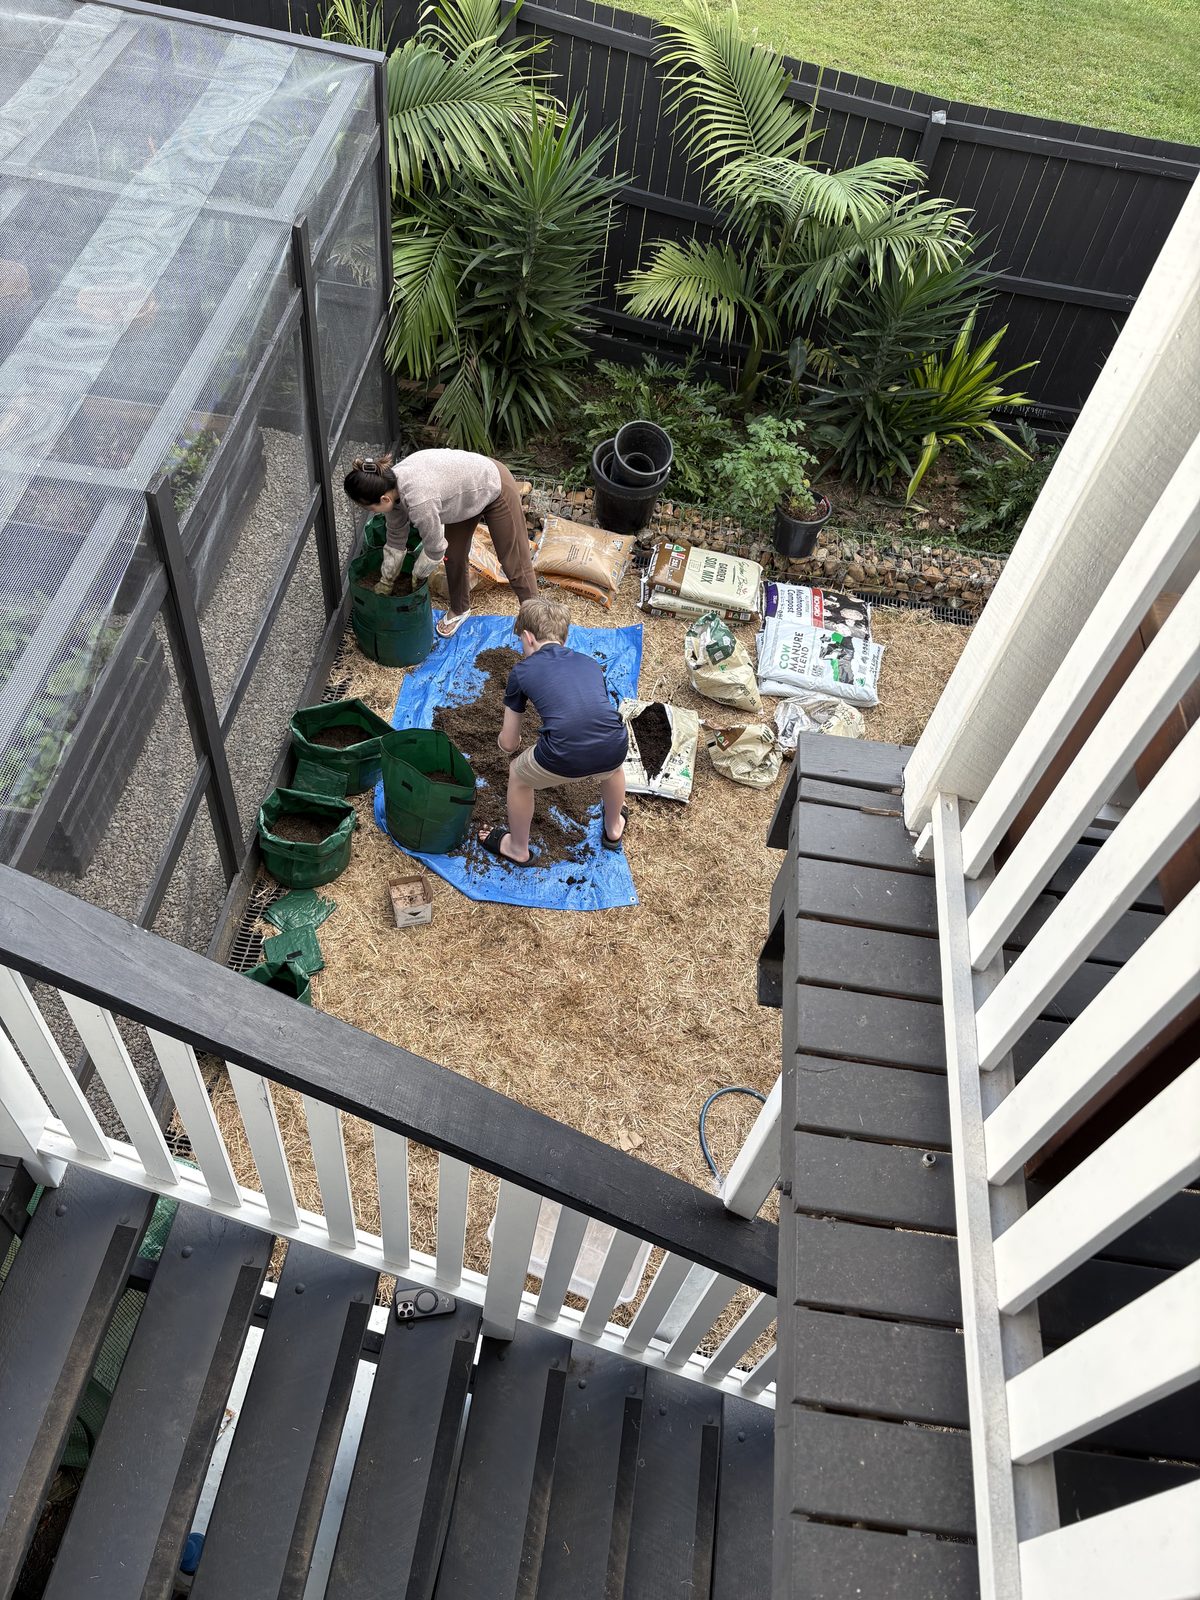
Planting it out
With the beds filled, planting day was the fun part - and another one to share. The seedlings from the greenhouse went in along with a few advanced herbs, spaced out and labelled so we’d know what was what once it all looked the same coming up.
This is the stage where it all looked finished and we relaxed. The beds were full, everything was in and for a week or two it was exactly the patch we’d pictured, which is precisely when the trouble started.
Where it all went wrong
This is the part we’d skip if we were trying to make ourselves look clever. We planted the beds out and they took off. Then, over a fortnight, they were systematically demolished. The bok choy and gai lan were the obvious casualty - possums stripped the leaves back to stalks - and they didn’t stop there. They came over the fence, worked along the tops of the beds and got to anything tender, night after night.
There was no point messing about with half-measures. We decided the only thing that was actually going to work was to enclose the whole patch properly - a rigid frame, clad on every face including the top, with no gaps for a possum to push through.
Building the enclosure
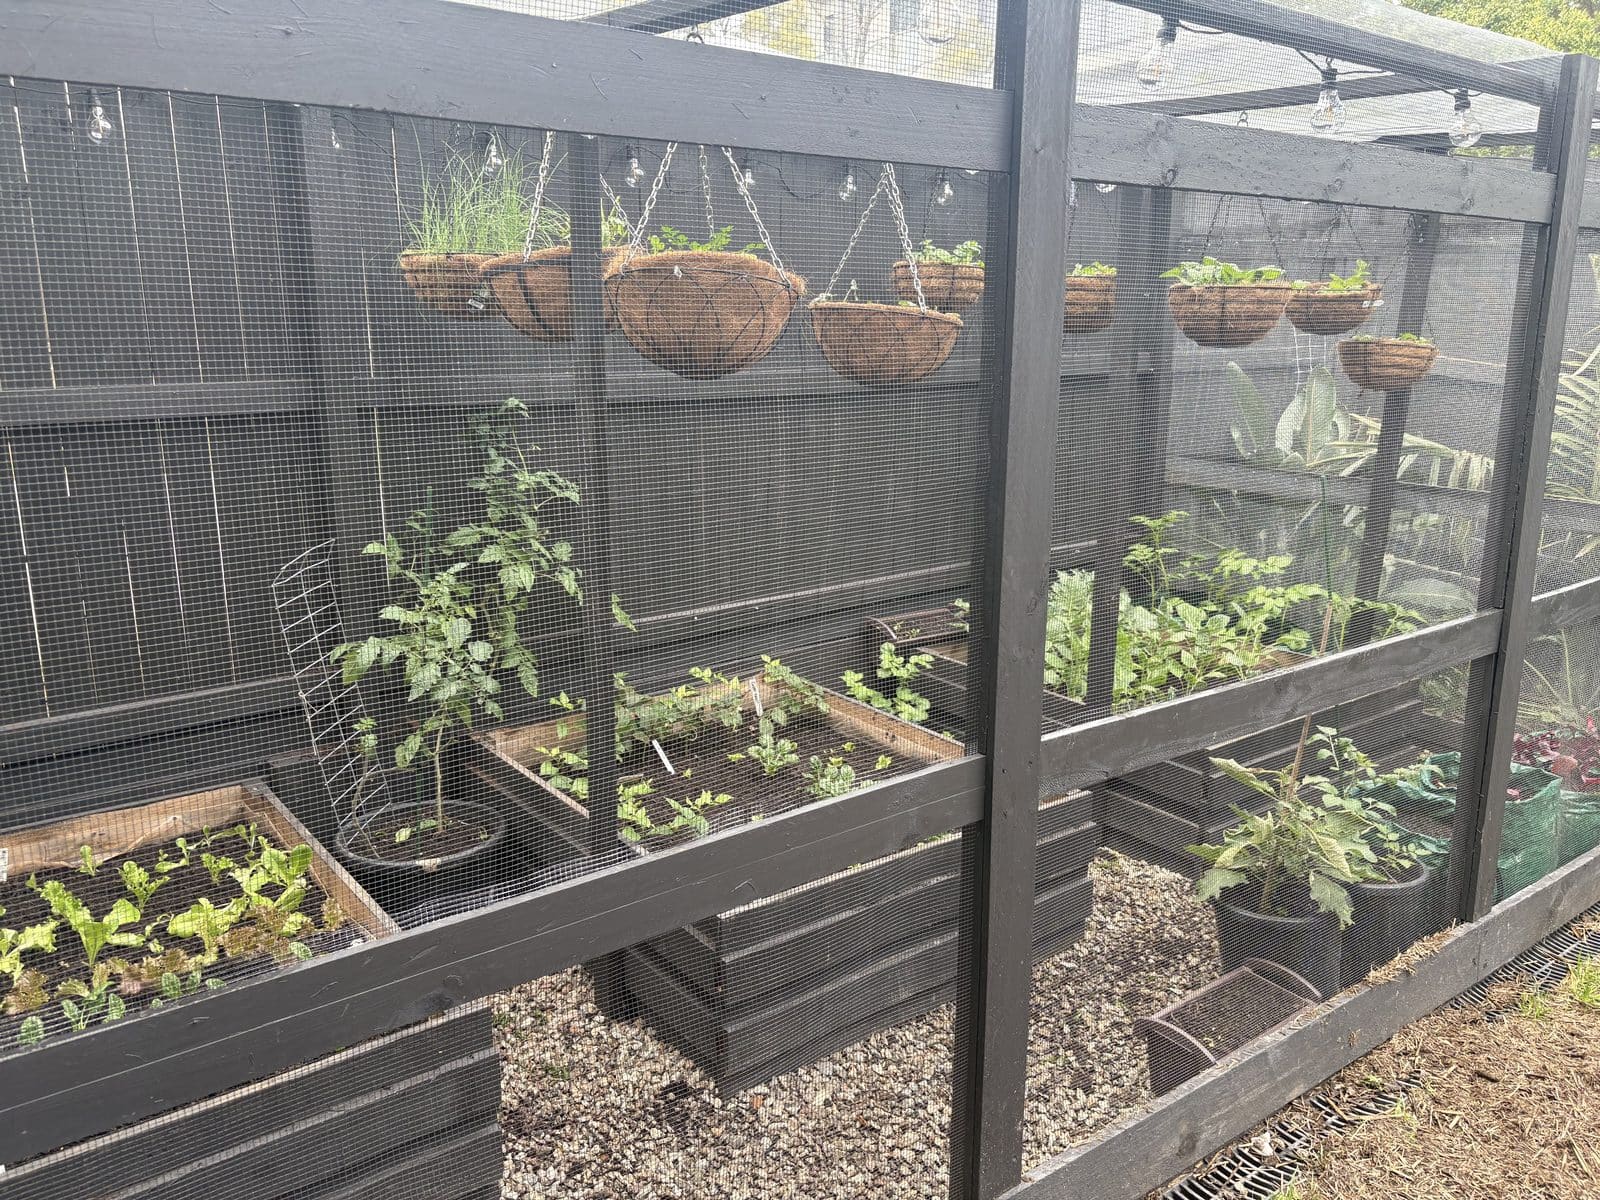
The enclosure is a treated-pine frame built around the full footprint of the three beds and the paths between them - roughly 6 by 2 metres, tall enough to walk into at 2 metres high and clad on every side and across the roof with mesh.
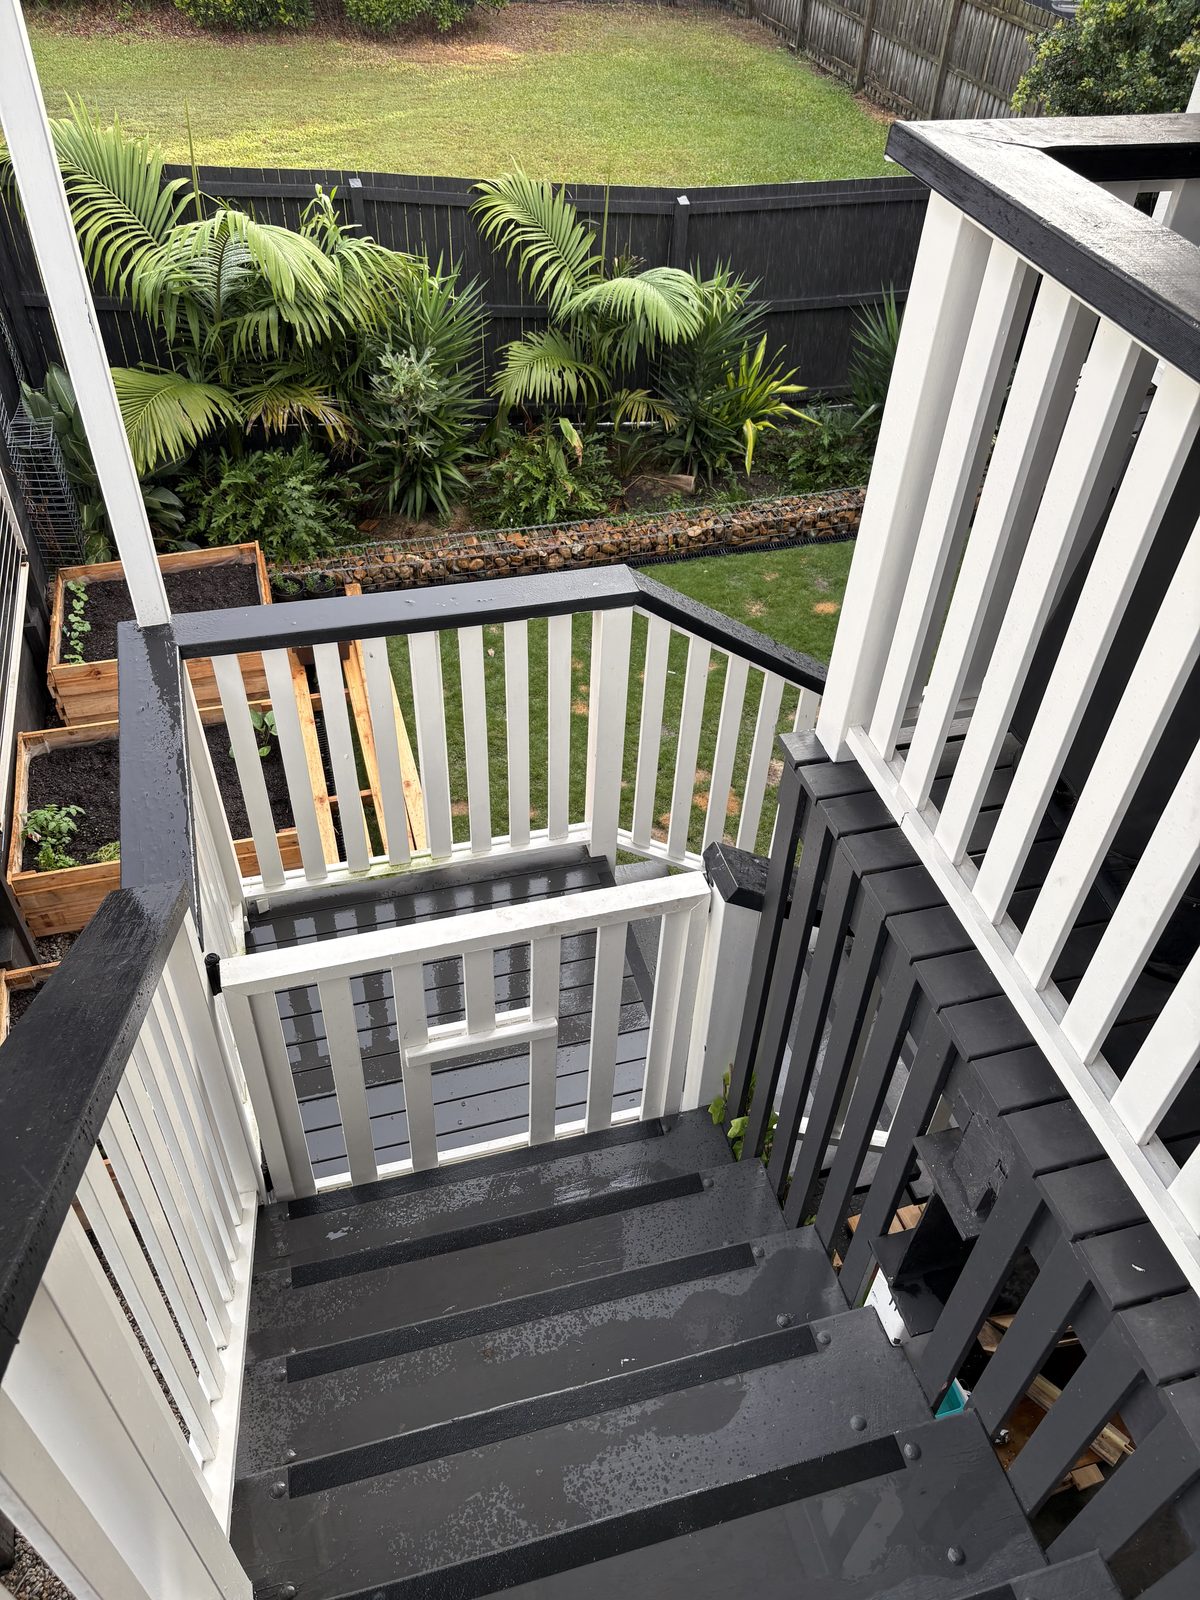
We framed it in studs and battens, all screwed together, so we could pull it square and tweak it as we went. The mesh is clad over the frame and held down with fence palings screwed over the top, so it can be drawn tight whenever it sags and the whole thing is painted charcoal to match the house rather than left to look like a cage bolted on as an afterthought. There’s a doorway on the accessible side, so you can actually get in to plant, weed and harvest.
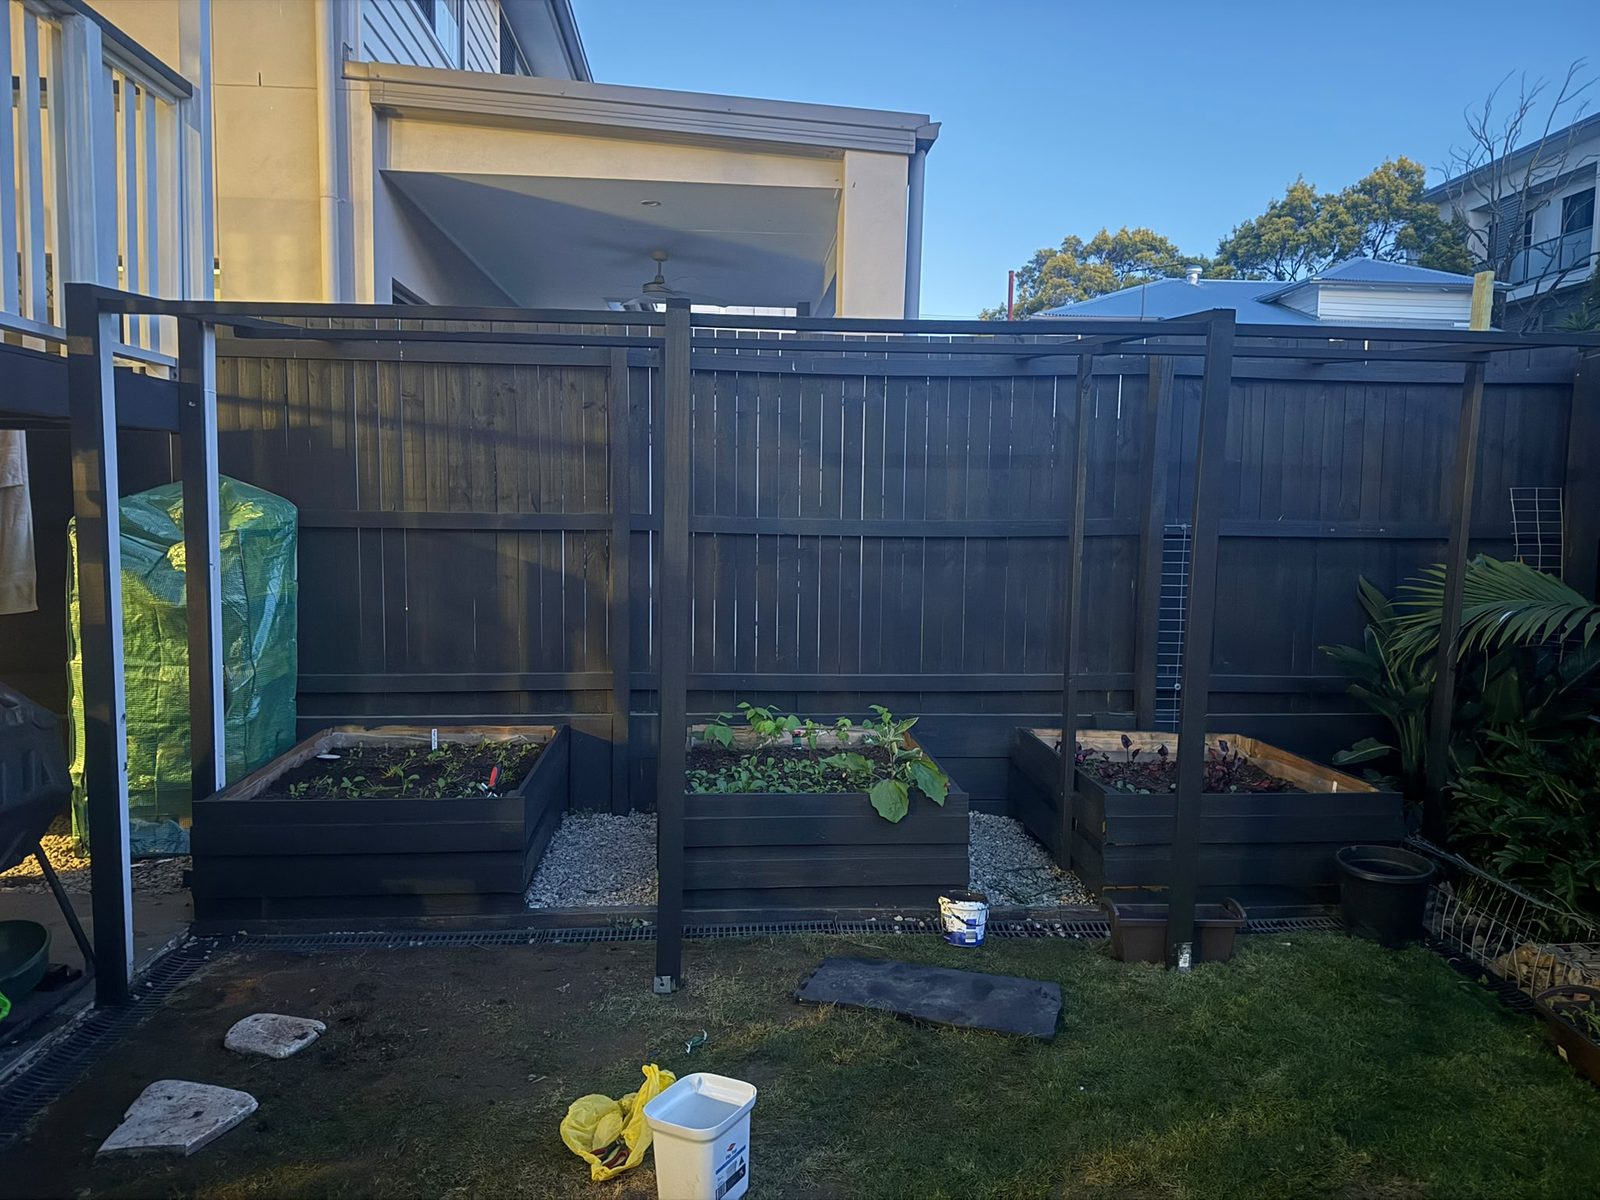
The mesh is the part that actually does the work. We clad every face - including the top - in 6.5mm mesh, fixed taut to the frame, so there’s nothing for a possum to push past or prise open. Every join is overlapped and fastened down; the gaps are where you lose. A possum will work a loose edge for as long as it takes, so it’s worth doing properly the first time.
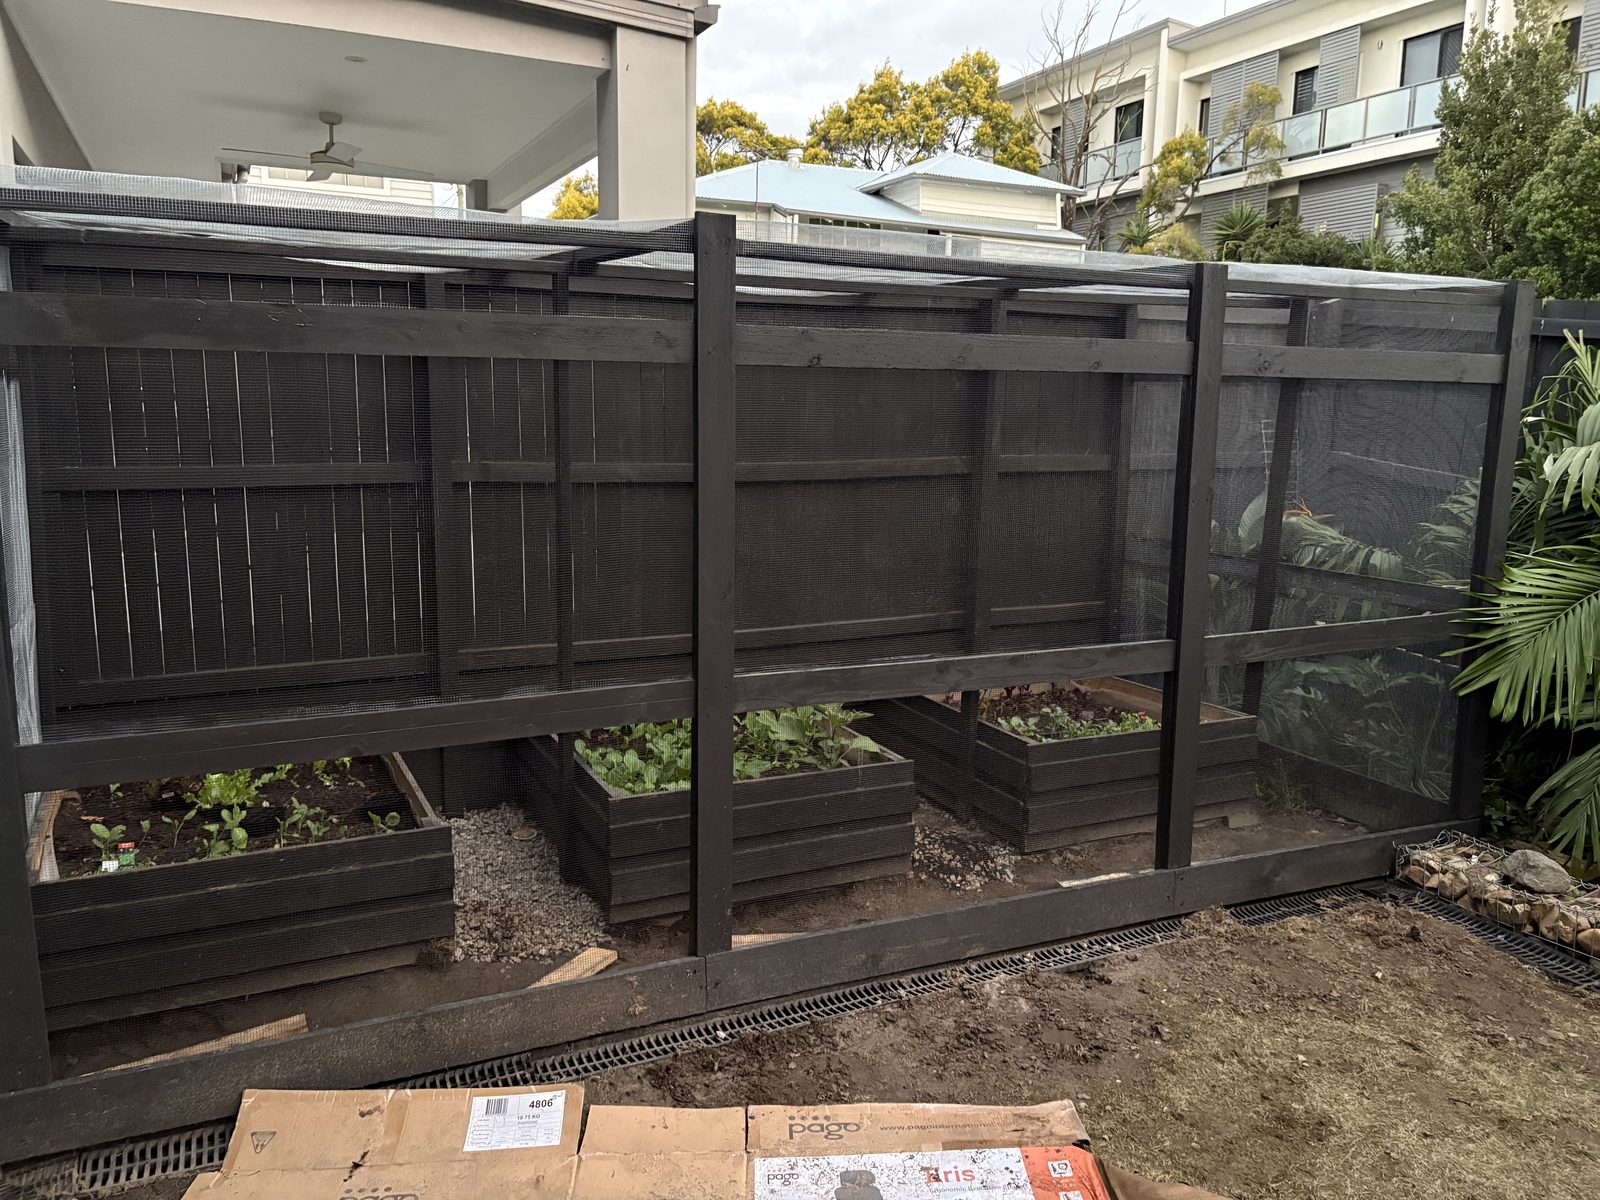
It took a while. Between sourcing the timber, staining it, setting the frame square around beds that were already in the ground and cladding every face including the top, it was a string of weekends rather than a single one. Working around planted beds slows everything down - you can’t just stand wherever’s convenient.
How it’s growing now
It was worth every weekend. The patch is finally growing the way we pictured at planting, just behind mesh now.
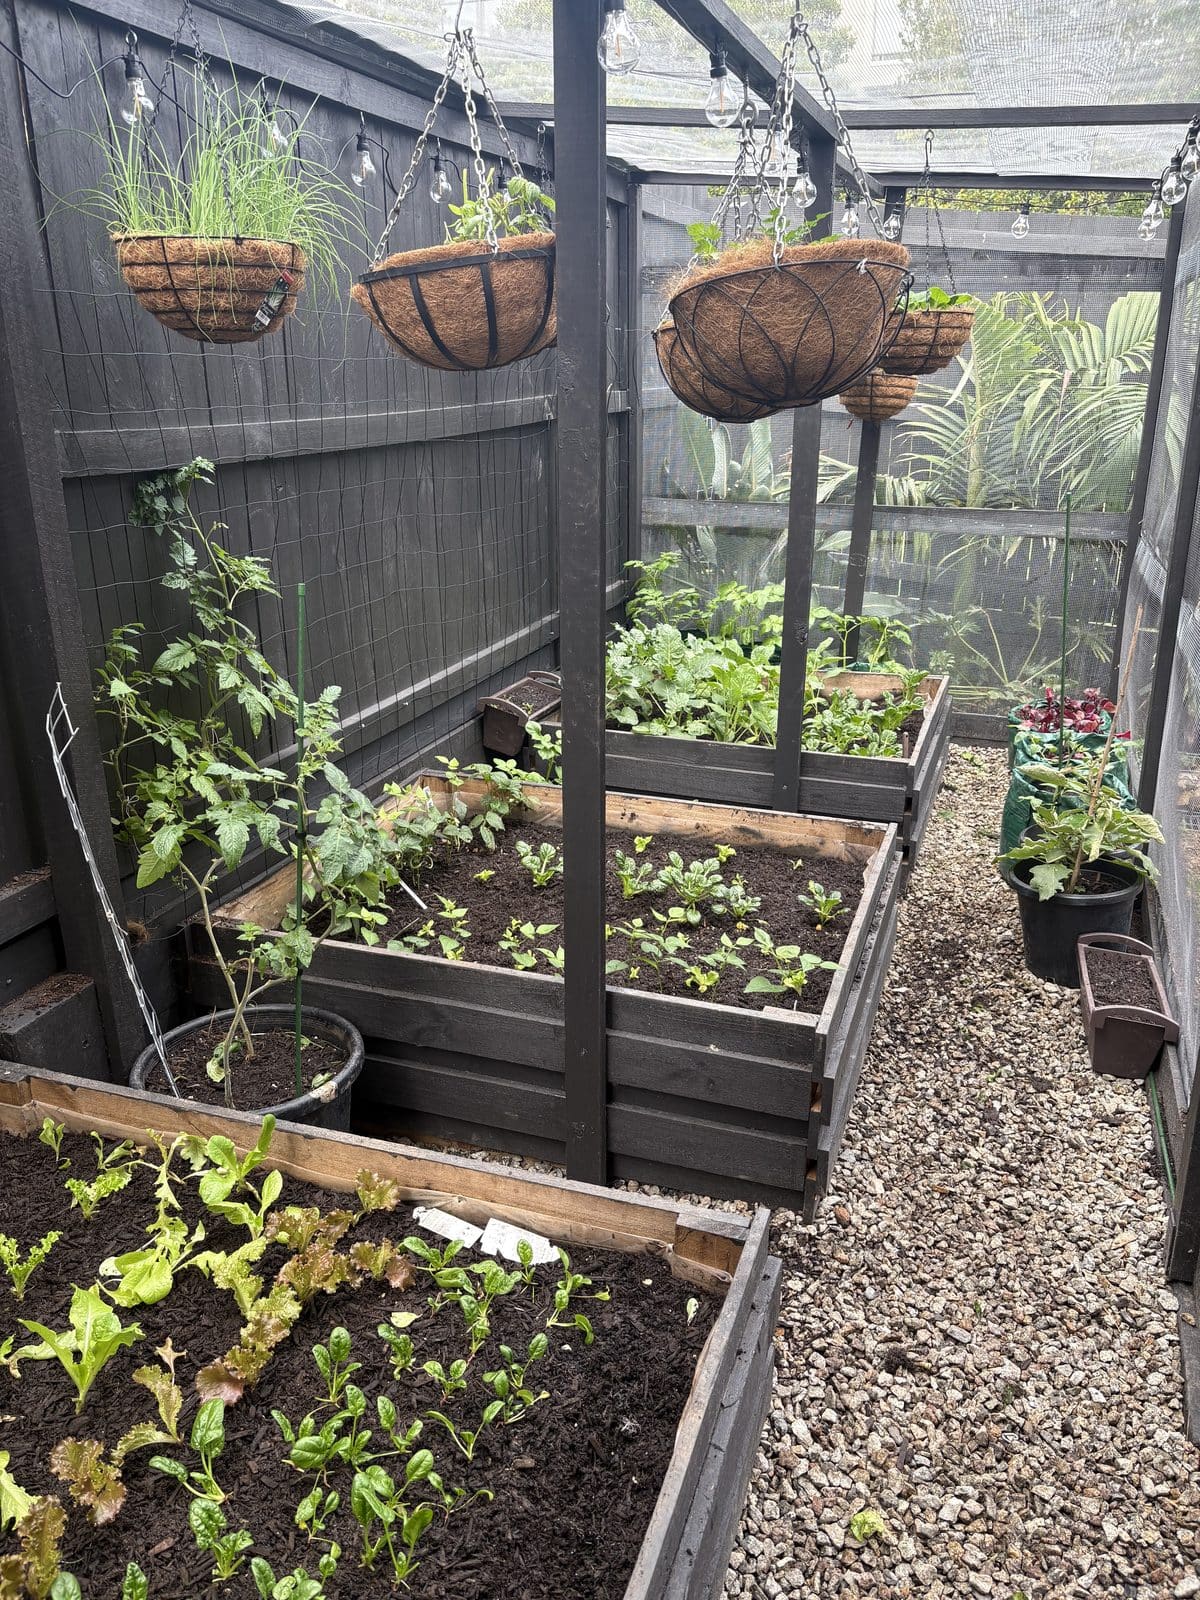
Inside the enclosure, everything is finally doing what it’s supposed to. The beds are full - lettuce, silverbeet, bok choy and gai lan actually keeping their leaves, climbing beans up the back wall, tomatoes staked through the middle. We’ve hung baskets from the top rails for strawberries and trailing things, which makes use of the vertical space the frame gave us and there are eggplants and herbs in pots and grow bags around the edges. A few marigolds for colour and to pull in the good insects.
The thing we didn’t expect is how much more we plant now that we know it’ll survive. When half of everything was getting eaten, it was hard to be bothered. Now there’s a reason to keep the beds turning over and we’re actually eating out of it most weeks.
A potting station to keep it running
The thing that turned the patch from a project into a habit was the little workshop we set up right beside it. A garden only stays productive if tending it is easy and that mostly comes down to whether your tools are to hand or buried in a shed at the other end of the yard.
So we mounted a plywood board on the fence at the end of the deck and hung everything off it: secateurs, snips, the trowels and hand forks, gloves, a sunhat, the seaweed tonic and liquid feeds, a basket for harvesting and a labelled tub for greens. Seed packets and labels live in there too.
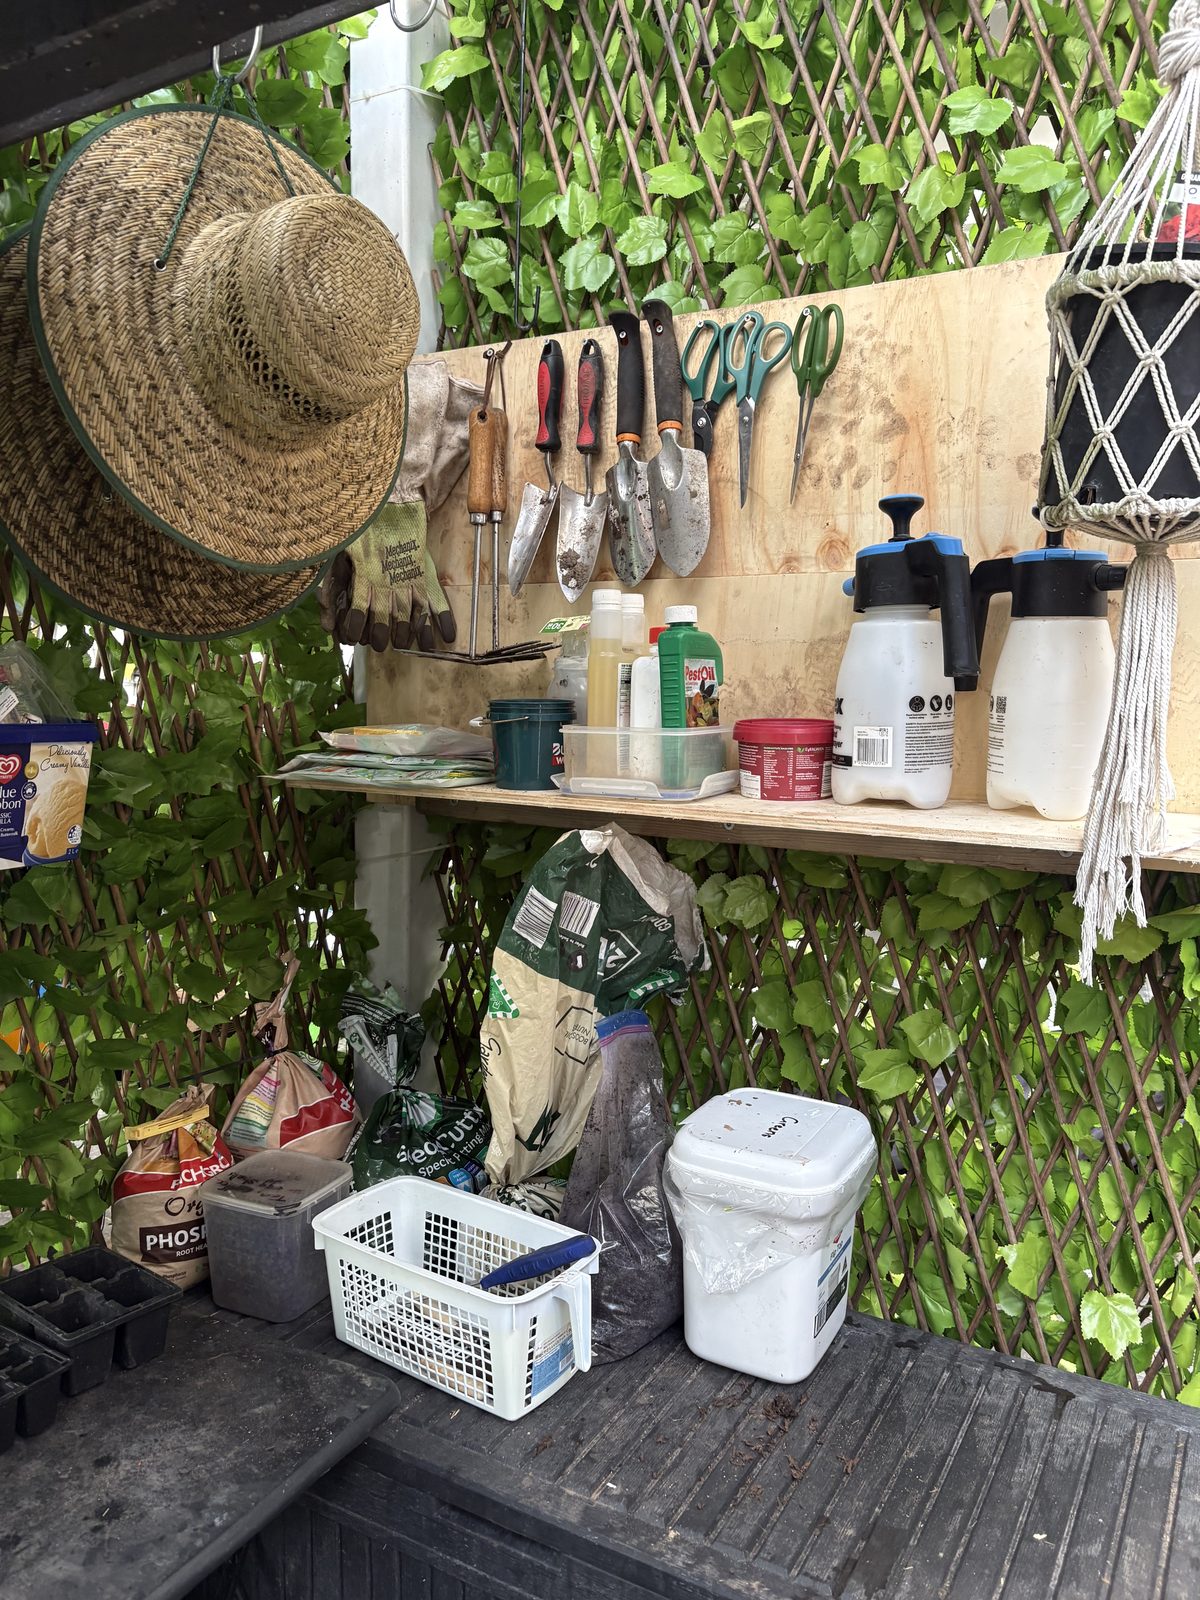
It’s a small thing, but it’s made the biggest difference to how often the garden actually gets looked after. When watering, feeding and picking take a couple of minutes because everything’s a step away, you do them. When they mean a trip to the shed, you put them off - and that’s how a patch slides. Having the station right where the beds are is what keeps the whole thing ticking over.
What we’d do differently
One thing, really: we’d build the enclosure first, before planting anything. Framing and cladding a cage around beds that are already full of seedlings is fiddly and slow and you spend the whole time worried about standing on something. If we’d accepted from the start that an unprotected patch was never going to make it here, we’d have saved ourselves the lost crops and the awkward build.
If you’ve got possums working your street, take it as read that you’ll need to enclose properly from the outset. Build the cage, clad it tight on every face including the roof and then you only have to do the fun part - the growing - once.
Veggie patch enclosure: common questions
Based on our Coorparoo, Brisbane backyard build.
Will raised garden beds keep possums and pests out?
No. Raised beds keep the soil contained and make the garden easier to work, but they do nothing to stop possums - if anything, the height brings the plants closer to a climbing animal. To actually exclude them you need a physical barrier: a framed enclosure clad in mesh on every face, including the top.
Is draped netting enough to protect a vegetable garden?
In a low-pressure yard, maybe. In a yard with active possums, draped netting sags into the plants, tangles and leaves gaps they quickly find and exploit. We didn't bother with half-measures - a rigid framed enclosure clad on every face is the only thing we'd trust.
Should I build the enclosure before or after planting the beds?
Before. Building a frame and fixing mesh around beds that are already planted is slow and awkward and you risk trampling your own seedlings. If you know you'll need an enclosure, build the empty cage first, then plant inside it.
Newsletter
Follow the build
One documented Coorparoo project - the costs, the approvals, the calls we would reverse. Lessons that translate, straight to your inbox.