How to Build a Possum-Proof Veggie Patch and Enclosure
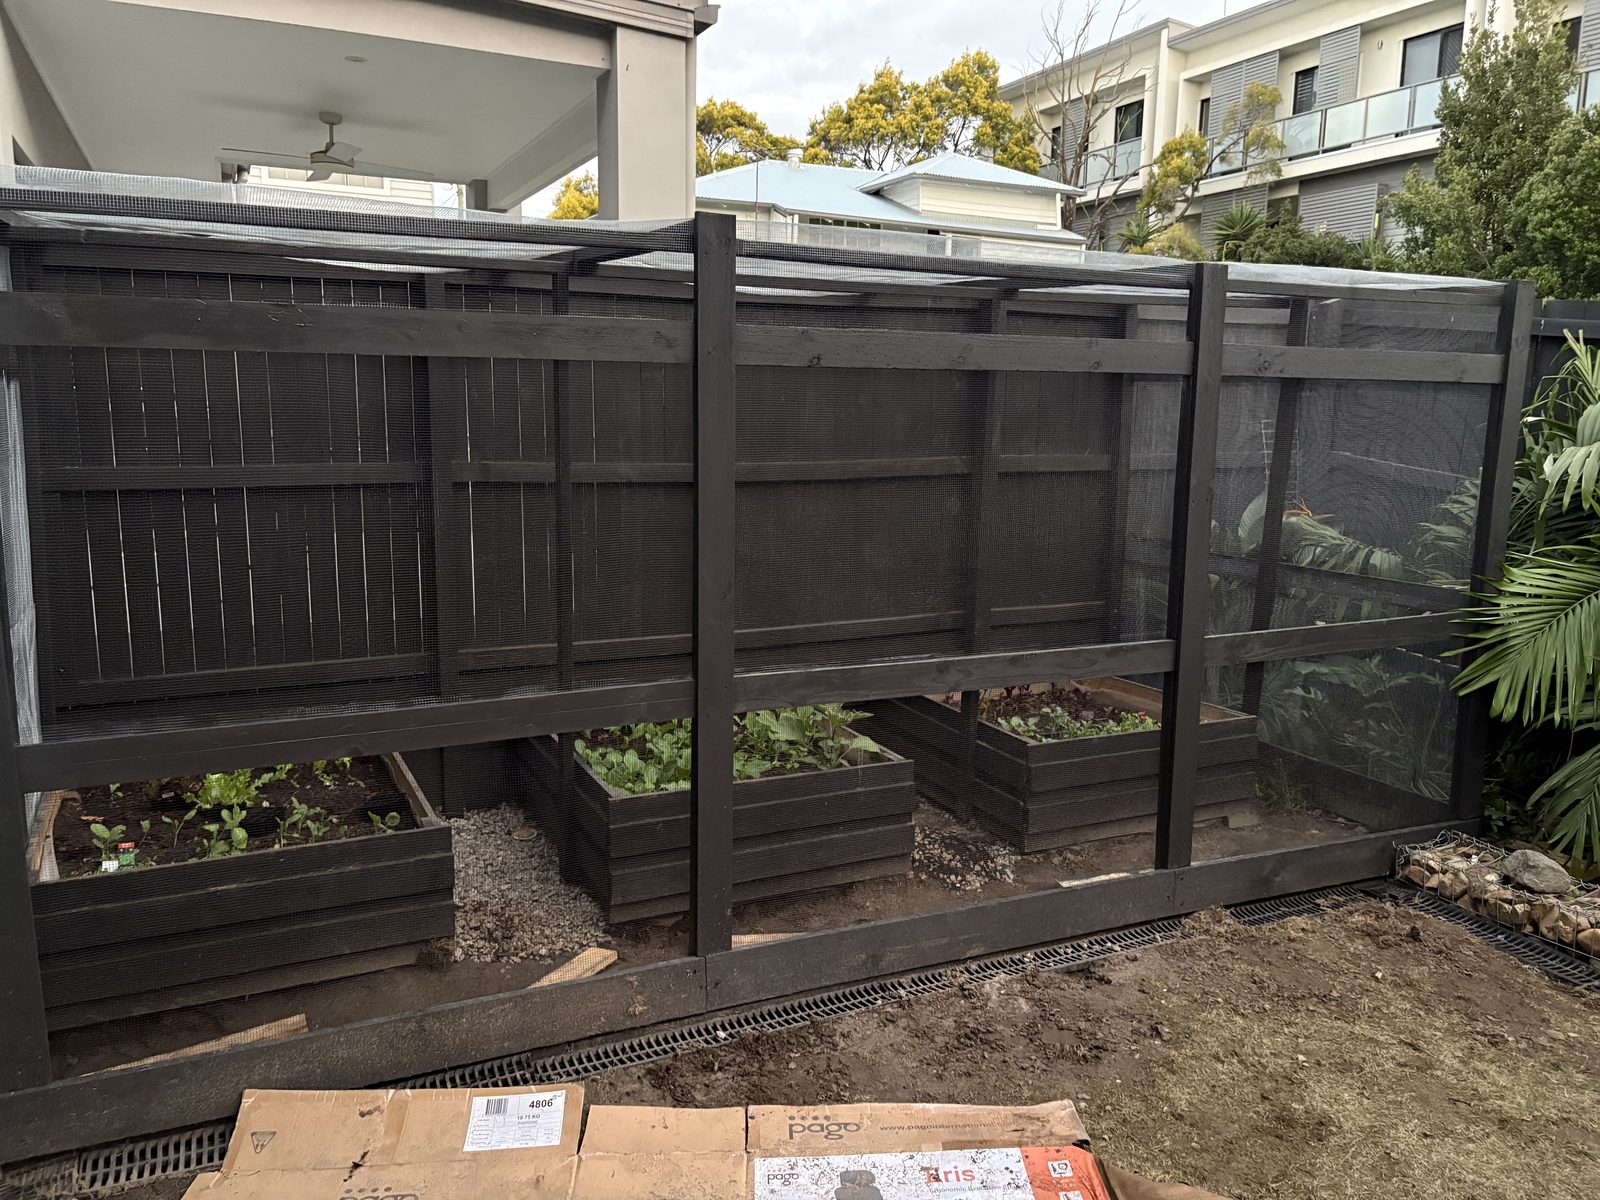
This is the full build for the vegetable garden behind our Coorparoo Queenslander: three raised sleeper beds, a seed-raising setup in a pop-up greenhouse, grow bags for the root crops and a walk-in timber-and-mesh enclosure over the whole lot to keep the possums out. If you want the story of why we ended up caging the whole thing, that’s over here. This guide is the how.
The build at a glance
- Raised beds
- 3 × treated pine sleeper beds, 1.5 × 1.5 m, ~0.5 m high
- Bed lining
- Black plastic to the inside walls
- Bed fill
- Premium garden soil + organic fertiliser (~1 m³ each)
- Root crops
- Carrots and potatoes in fabric grow bags
- Seedlings
- Raised from seed in a pop-up greenhouse
- Enclosure
- 6 × 2 m footprint, 2 m high, walk-in
- Frame
- Treated pine studs and battens, screwed
- Cladding
- 6.5mm mesh on all walls and the roof
- Mesh fixing
- Fence palings screwed over the mesh, charcoal paint finish
Step 1 - Build the raised beds
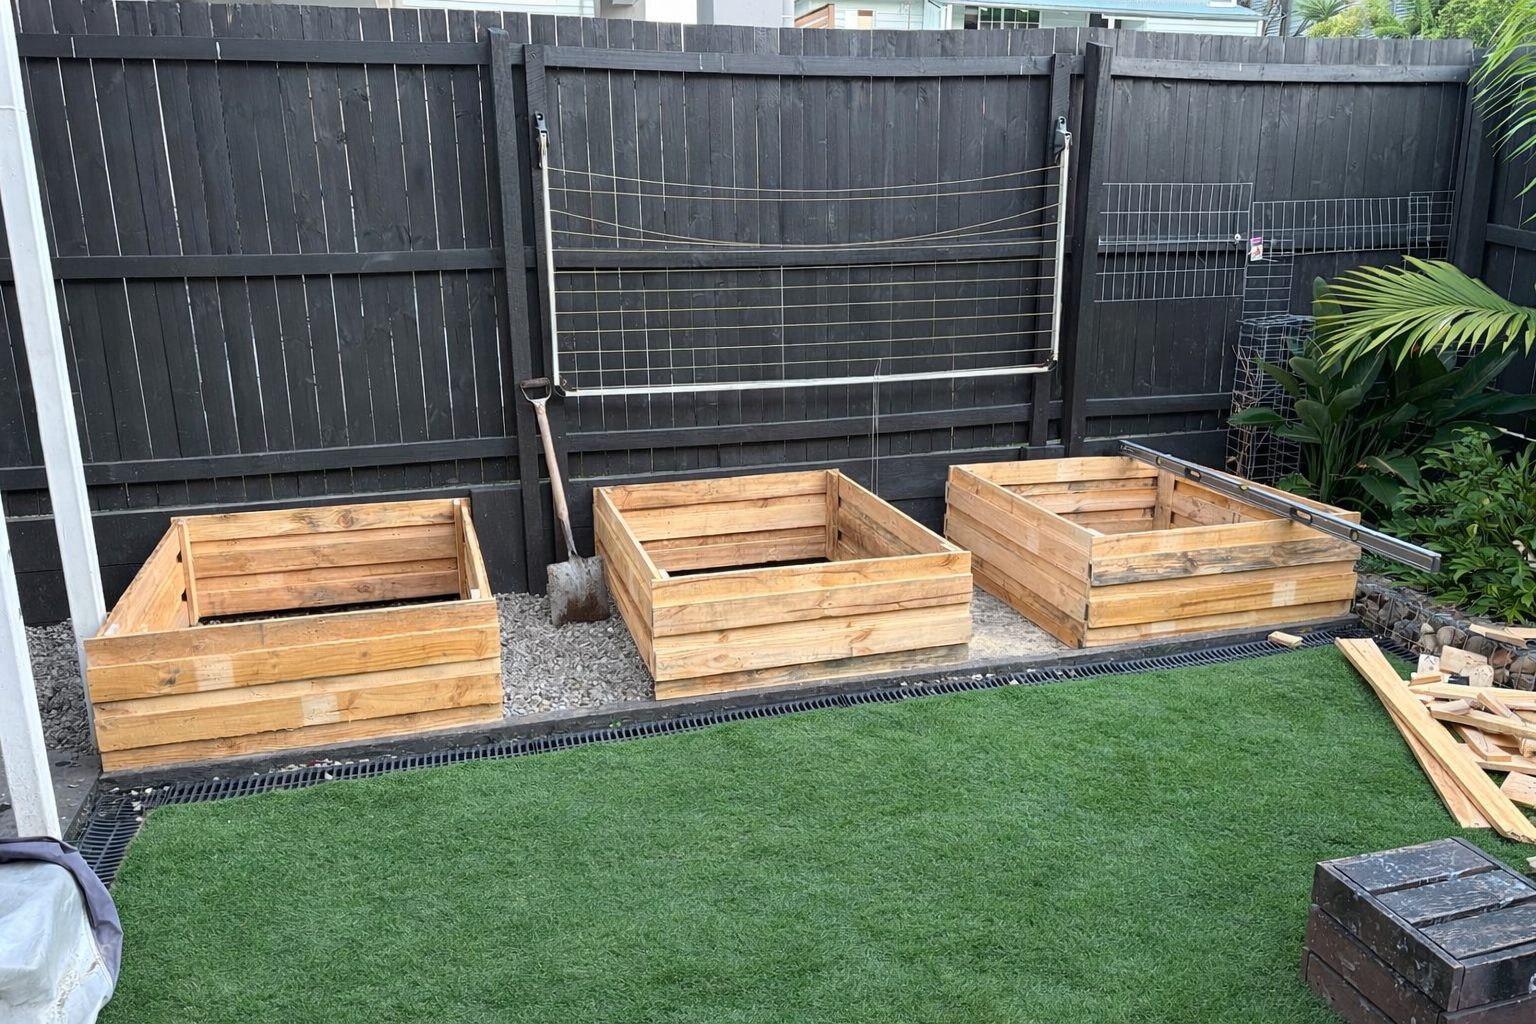
The beds are three treated pine sleeper boxes, each 1.5 × 1.5 m and standing about half a metre off the ground. Square them up and get them level before you fill them - it’s a five-minute job on empty boxes and impossible once they’re full of soil.
Line the inside walls with black plastic before filling. The lining keeps the soil and constant moisture off the timber, so the sleepers last and stops soil washing out through the joints. Staple it to the inside top edge and leave the base open, so water can still drain.
How much soil each bed needs
This is where people under-buy. Each bed has a footprint of 1.5 × 1.5 m = 2.25 m². Filled to about 450 mm of soil (leaving a little freeboard at the top), that’s roughly 1 cubic metre - about 1,000 litres - per bed, or ~3 m³ for all three.
Soil estimate per bed (1.5 × 1.5 m, ~450 mm deep)
- Volume per bed
- ≈ 1.0 m³ (1,000 L)
- All three beds
- ≈ 3.0 m³ (3,000 L)
- In 25 L bags
- ≈ 40 bags per bed (~120 total)
- In 30 L bags
- ≈ 34 bags per bed (~100 total)
- Bulk delivery
- Cheaper and easier at this volume - order by the m³
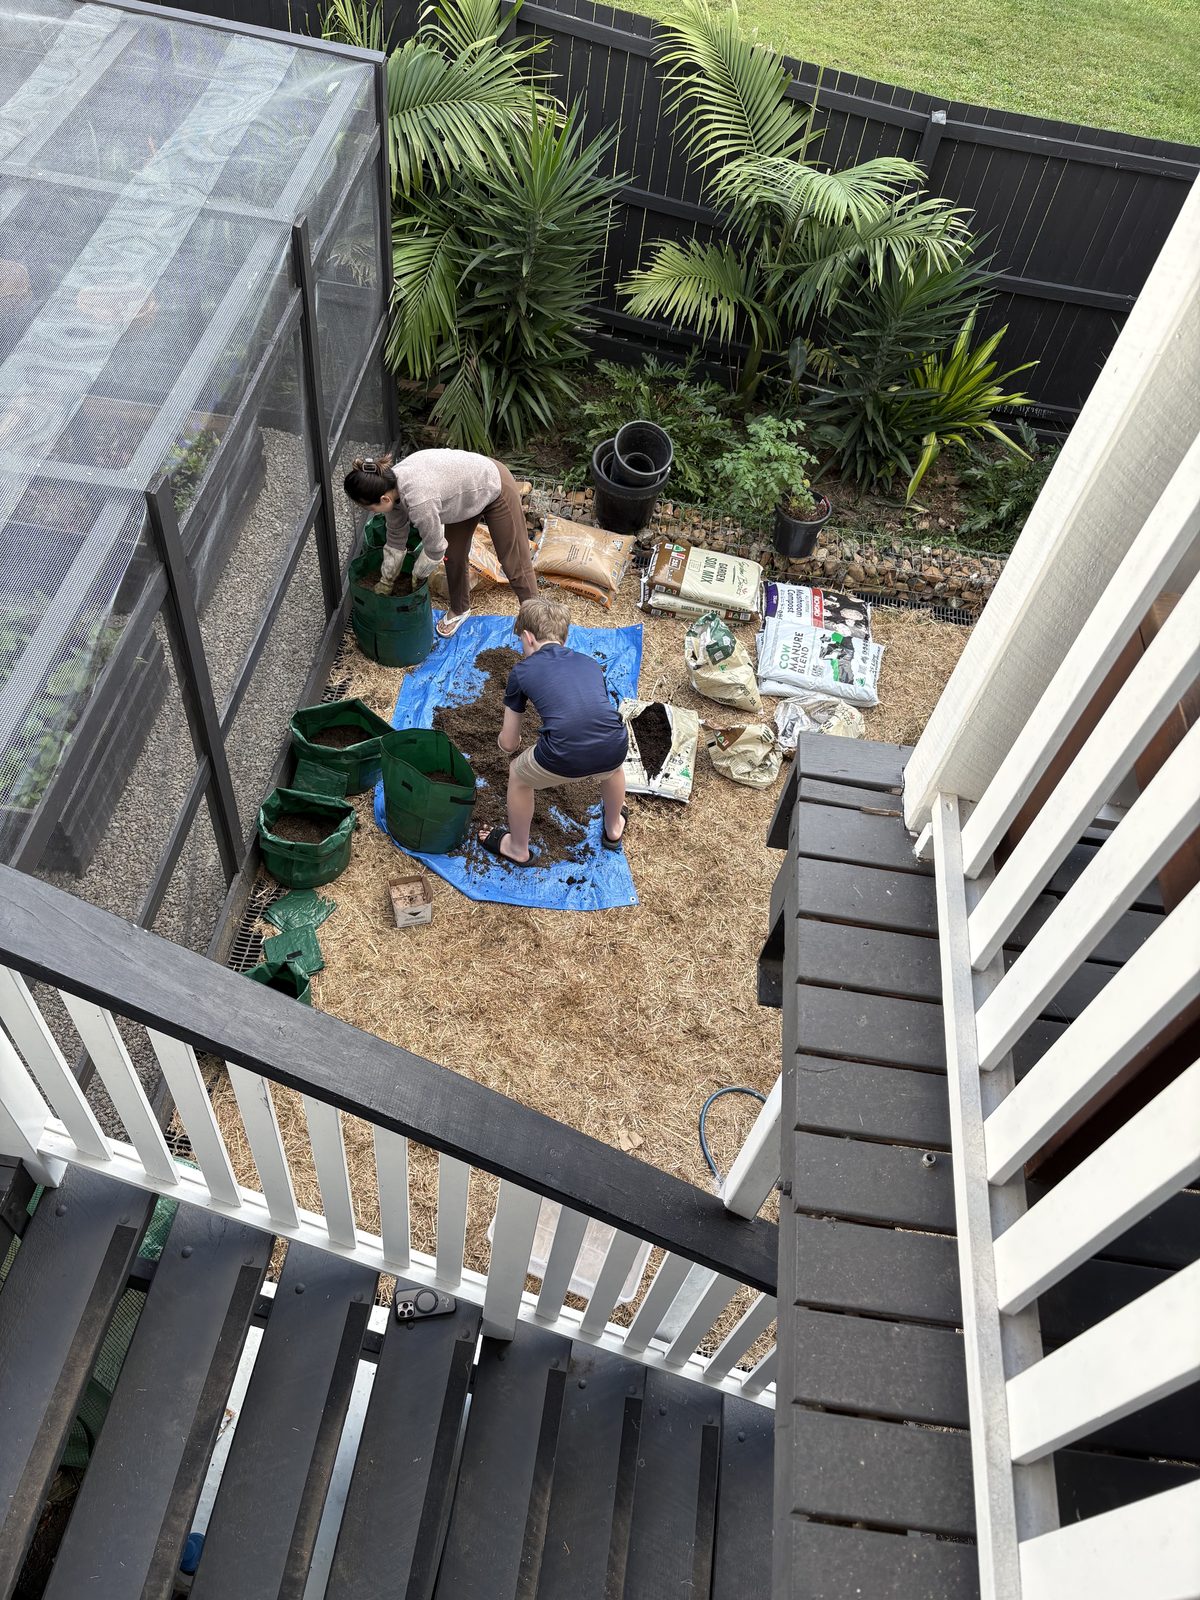
At ~3 m³, buying bagged mix gets expensive and heavy fast - a bulk soil delivery by the cubic metre is the cheaper, easier route. Fill with a premium garden soil and work through a good organic fertiliser (we also blended in mushroom compost and cow manure for fertility). Buy about 10% extra to allow for settling and if you want to save on premium mix you can bulk out the bottom third of each bed with coarse organic matter and keep the good stuff in the top root zone.
Step 2 - Raise the seedlings in the greenhouse
We grow most of the patch from seed in a cheap zip-up pop-up greenhouse on the deck. It traps warmth, keeps the weather and birds off the fresh seed and gives the seedlings a sheltered start. Leafy greens and Asian veg do well this way - kailaan (gai lan), choy sum, pak choy, shungiku, lettuces, broccoli and spring onions.
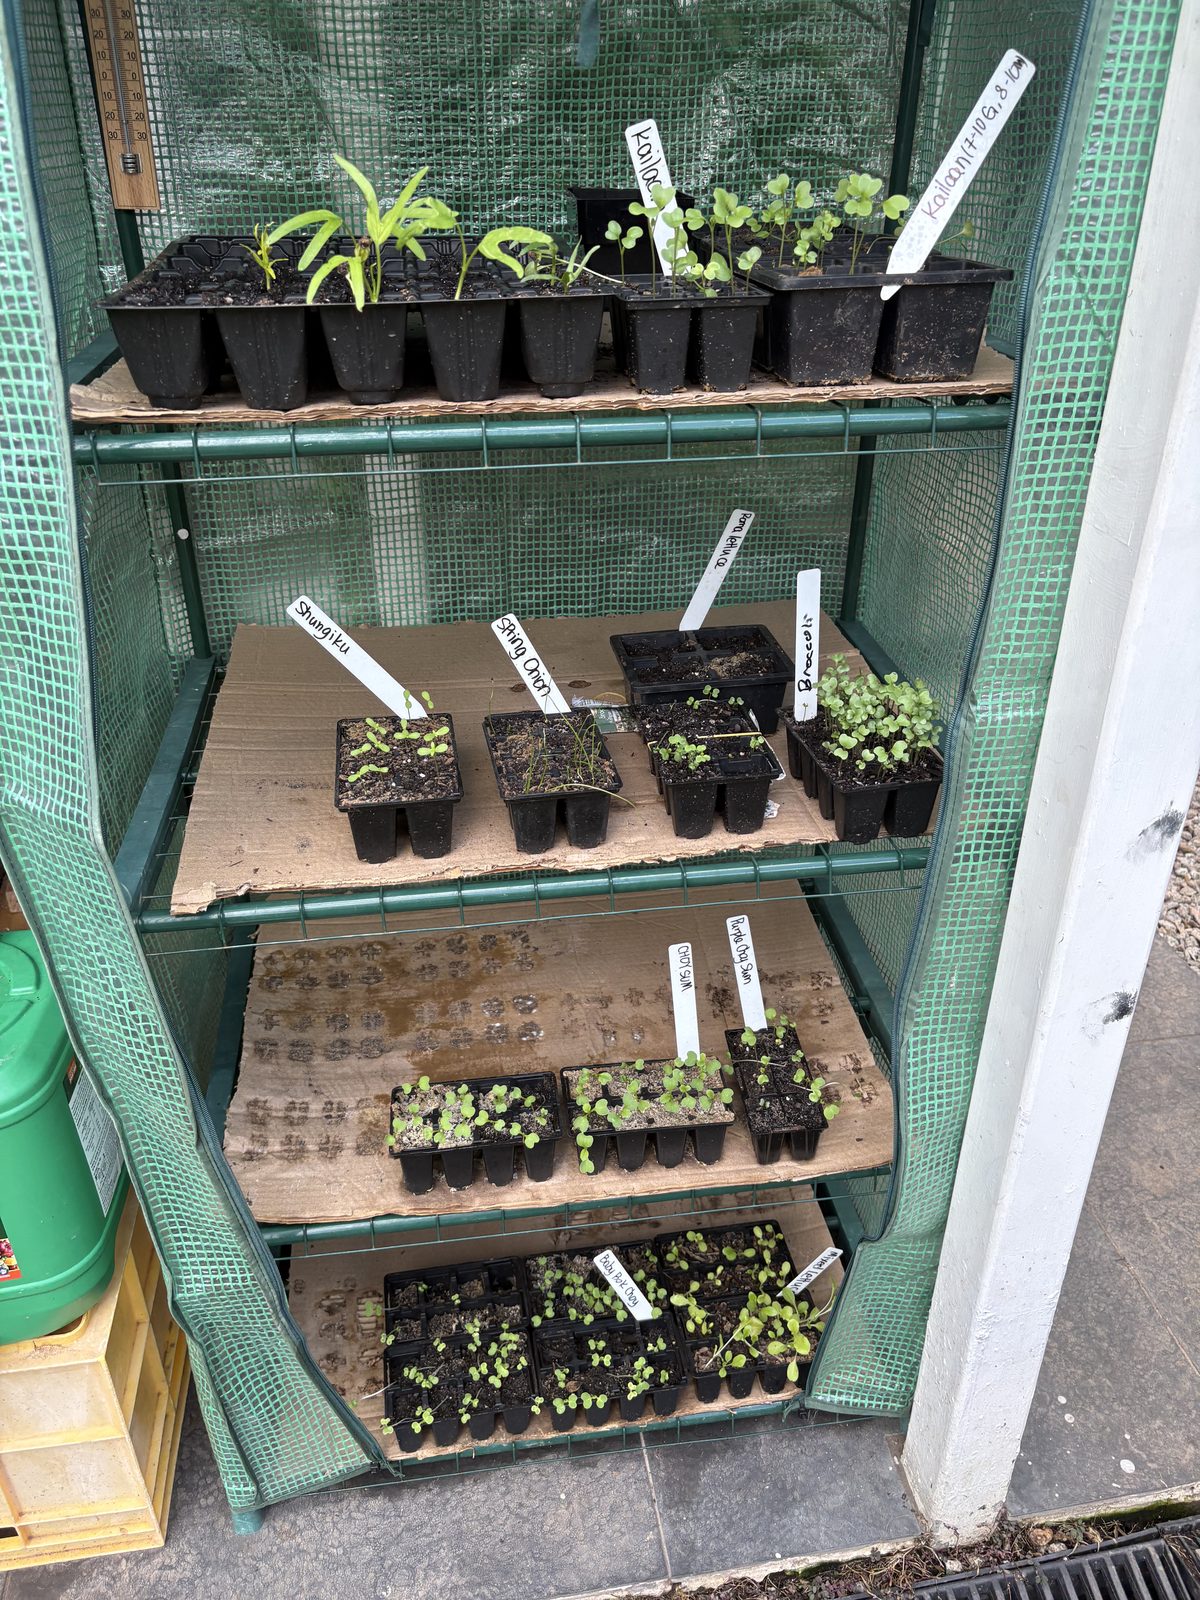
Sowing. Fill clean punnets or trays with seed-raising mix and firm it gently. Sow at a depth of about twice the seed’s width - tiny seeds barely covered, larger seeds a little deeper. Label every tray immediately with the variety and date.
Watering. Water gently, so you don’t wash the seed around - a fine mist or bottom-watering (sitting the tray in a shallow water bath until the surface darkens) is best. Keep the mix damp, but never waterlogged; seedlings rot in soggy mix.
Checking on them. Look in every day. Check the mix hasn’t dried out, watch for the first shoots and ventilate on hot days - a closed greenhouse in Brisbane sun cooks seedlings, so unzip the cover when it’s warm. Turn the trays every few days, so the seedlings grow straight instead of leaning to the light.
Transplanting. Once each seedling has its first true leaves and a decent little root ball, harden it off (a few days sitting outside the greenhouse) and then transplant into the beds, spaced and labelled.
Step 3 - Grow carrots and potatoes in grow bags
The root crops go in fabric grow bags rather than the beds, on purpose.
Why carrots go in bags. Carrots fork, split and go hairy in heavy, stony or freshly manured soil. They want a deep, loose, low-nitrogen mix to grow long and straight and a bag of fine, free-draining mix gives exactly that - plus stone-free root run and easy pulling.
The process: fill a bag with a loose, free-draining mix (premium veg/potting mix cut with coarse sand; no fresh manure). Sow seed thinly across the surface and cover lightly, about 5 mm. Carrots are slow and erratic to germinate - 2-3 weeks, so keep the surface constantly moist (a board or damp hessian laid over the top until they’re up really helps). Thin the seedlings to 3-5 cm apart once they have a couple of true leaves and harvest when the shoulders show, around 10-12 weeks.
Why potatoes go in bags. Potatoes need loose medium and “hilling up” - burying more of the stem as it grows, so more tubers form along it and keeping tubers covered, so they don’t go green. A bag lets you start shallow and top up as the plant grows, gets a big yield from a small footprint, keeps them separate from the beds (they’re hungry and sprawling and it helps with crop rotation and disease) and means you harvest by tipping the bag out - no fork through your spuds.
The process: chit the seed potatoes first - sit them somewhere cool and light for a couple of weeks until short green shoots form. Put 10-15 cm of mix in the bottom of the bag, sit 2-3 seed potatoes on it shoots-up and cover with about 10 cm of mix. Water in. As the shoots reach ~20 cm, add more mix to bury about two-thirds of the stem and repeat that hilling until the bag is full. Keep it moist and fed. When the foliage flowers, then yellows and dies back, tip the whole bag out onto a tarp to harvest.
Step 4 - Build the walk-in enclosure
This is what makes the whole thing work in a possum yard. Ours is a walk-in cage with a 6 × 2 m footprint, standing 2 m high - tall enough to walk into and work in, sized to cover the three beds and the paths between them.
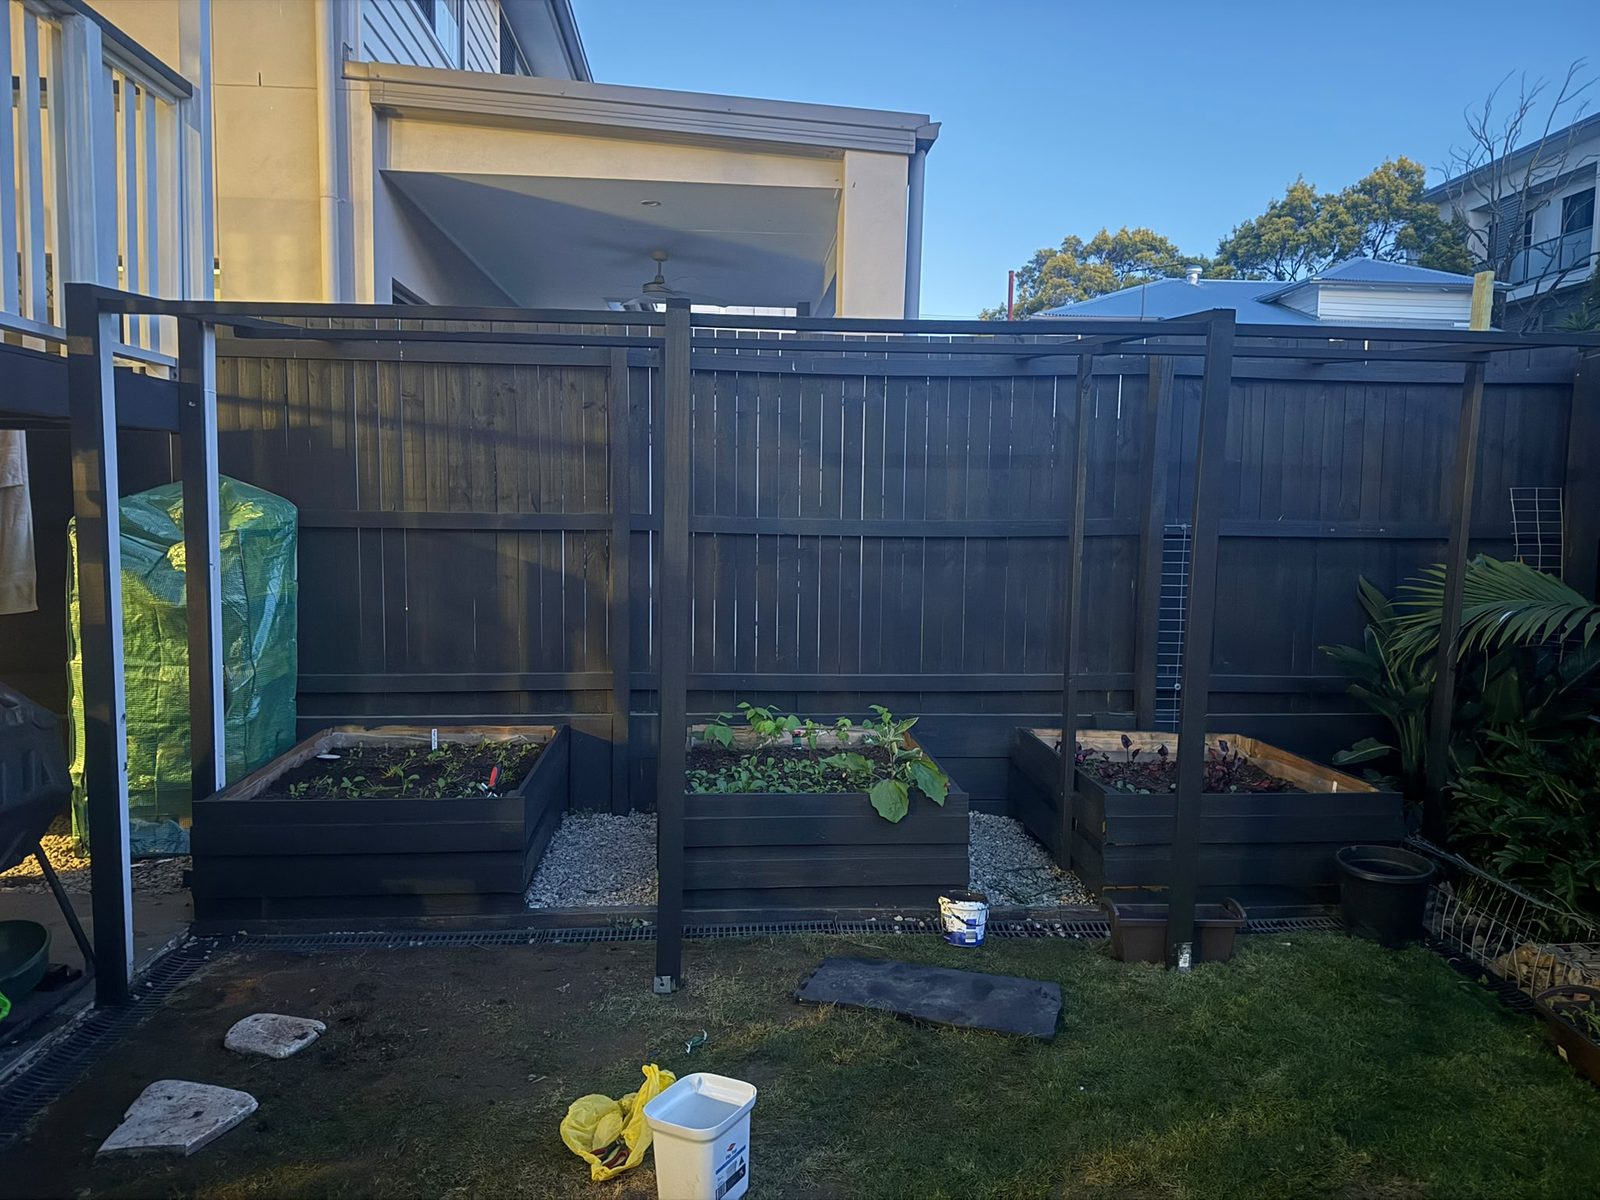
Frame it in treated pine. Use studs at the corners and at intervals along each wall, with battens as the top plates, rails and roof members. Screw it all together rather than nailing - screws let you pull the frame square, adjust as you go and undo anything that isn’t right.
Clad every wall and the roof in 6.5mm mesh. The roof matters as much as the walls - a possum will come over the fence and drop straight in from above if the top is open. Pull the mesh as taut as you can by hand as you fix it.
Hold the mesh down with fence palings. Run fence palings over the top of the mesh along the frame, screwing them down, so they sandwich the mesh against the studs. Because they’re screwed, not nailed, they’re adjustable - back them off, pull the mesh tighter to take out any sag and re-fix. This is the trick that keeps the cladding drum-tight over time.
Fix the roof. Most of the mesh is fixed onto the studs and held under the palings. Where roof sections meet, twist tie-wire to draw the panels together, so there’s no gap along the seams.
Paint it charcoal black. Once it’s all clad and tight, paint the whole frame and palings charcoal black to match the house. Besides tying it into the building, dark paint makes the mesh visually disappear, so you see the garden, not the cage.
The finished patch
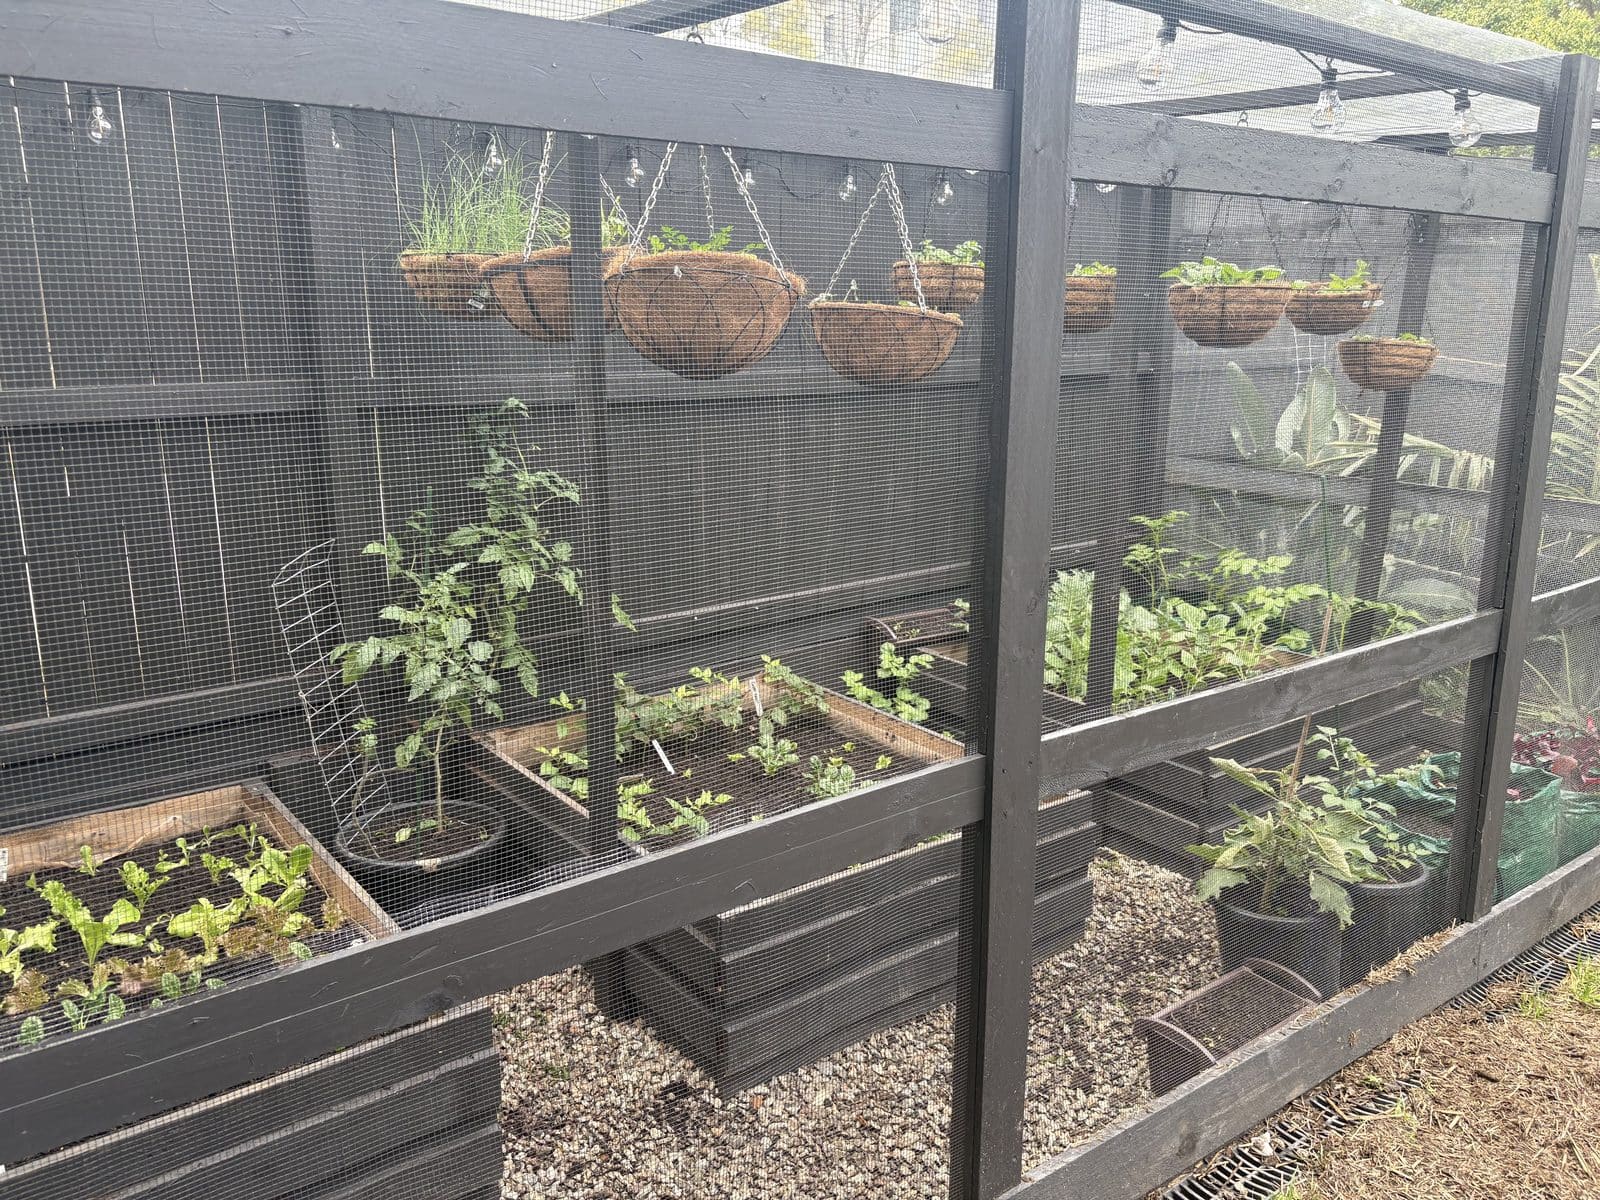
With the cage closed in and the beds and bags planted out, everything finally grows the way it should - leafy greens keeping their leaves, climbing beans up the walls, tomatoes staked through the middle, strawberries in baskets hung off the top rails and carrots and potatoes turning over in the bags.
Building a veggie patch enclosure: common questions
From our Coorparoo, Brisbane backyard build.
How much soil do I need for a 1.5 x 1.5 m raised bed?
Filled to about 450 mm of soil, a 1.5 × 1.5 m bed takes roughly 1 cubic metre (about 1,000 litres). That's around 40 × 25 L bags per bed, so for three beds (about 3 m³) a bulk soil delivery by the cubic metre is far cheaper and easier than bagged mix. Buy about 10% extra to allow for settling.
Why grow carrots and potatoes in grow bags instead of the bed?
Carrots fork and go hairy in heavy or freshly manured soil - a bag of loose, low-nitrogen, free-draining mix gives the deep, stone-free run they need to grow straight. Potatoes need loose medium and hilling up as they grow and a bag lets you top up the medium, get a big yield from a small footprint and harvest by simply tipping the bag out rather than forking through the soil.
What size and mesh should a walk-in veggie enclosure be?
Ours is 6 × 2 m and 2 m high, framed in treated pine studs and battens (screwed, so it's adjustable) and clad on all walls and the roof in 6.5mm mesh. The mesh is held down by fence palings screwed over it, so you can pull it tight and re-fix as it settles, with tie-wire twisting the roof seams together. The roof is essential - possums drop in from above if the top is open.
How do you keep the mesh tight on a garden enclosure?
Screw fence palings over the top of the mesh along the frame, so they clamp it against the studs. Because they're screwed rather than nailed, you can back them off, pull the mesh tighter to remove any sag and re-fix. Twist tie-wire to draw roof panels together at the seams.
How do you raise vegetable seedlings in a pop-up greenhouse?
Sow into seed-raising mix at about twice the seed's depth, label every tray and water gently by misting or bottom-watering. Keep the mix damp, but not soggy, check daily and ventilate on hot days, so the closed greenhouse doesn't cook them. Harden the seedlings off for a few days once they have their first true leaves, then transplant into the beds.
Newsletter
Follow the build
One documented Coorparoo project - the costs, the approvals, the calls we would reverse. Lessons that translate, straight to your inbox.